
As the festive season comes near, I love to update my nails to match the holiday cheer. A great nail design can make you feel more confident and ready for the fun ahead.
In this article, I’ll share five classy holiday nails christmas perfect for Christmas. You’ll see elegant red and green combos and metallic finishes. These ideas will inspire you to try something new and exciting this holiday season.
Key Takeaways
- Discover the latest trends in holiday nail designs
- Learn how to choose the perfect nail design for your Christmas celebrations
- Get inspired by elegant and sophisticated nail art ideas
- Find out how to make your nail design last throughout the holiday season
- Explore different nail art techniques to try at home
The Magic of Holiday Nail Art
As the holiday season comes near, holiday nail art brings festive flair to our look. It’s a time when creativity has no limits. Nail art becomes a key part of our holiday fun.
Why Nail Designs Complete Your Holiday Look
Nail designs are key to our holiday look. They add elegance and festivity, connecting us to the season. Whether for a party or just to feel festive, the right nail design makes a big difference.
This Season’s Nail Trends
This season, nail trends mix classic holiday colors with a modern twist. The colors range from deep reds and emerald greens to metallic silvers and golds. Here are some top trends:
| Trend | Description | Key Colors |
|---|---|---|
| Metallic Accents | Adds a touch of luxury to any nail design | Gold, Silver, Bronze |
| Classic Stripes | A timeless design that’s perfect for the holidays | Red, White, Green |
| Nail Art | Intricate designs that showcase holiday cheer | Multi-color |
How I Choose My Festive Manicures
When picking my festive manicures, I think about the event and my style. For formal events, I go for elegant designs with metallic accents. For casual get-togethers, I might pick something fun, like candy cane stripes or snowflake patterns.
The most important thing is to have fun and be creative. With so many designs out there, you’re bound to find one that matches your holiday vibe.
Essential Tools and Products for Festive Nail Art
To get perfect holiday nail art, you need the right tools and products. I’ll show you what you need below.
Basic Supplies You’ll Need
Start with these basic supplies for festive nail art:
- Nail polish in holiday colors
- Nail art brushes for details
- Nail dotting tool for patterns
- Nail glue for repairs
- Nail cleanser for prep
These essential tools will help you make many nail art designs. They range from simple to complex.
Color Palettes for Christmas
Christmas is all about bright, rich colors. Here are some popular palettes for holiday nail art:
- Red and green for a classic look
- Gold and silver for luxury
- Pastel shades for a soft, winter feel
Prep Work for Perfect Holiday Nails
Getting your nails ready is key for perfect holiday nails. This includes:
Nail Health Tips Before Application
Before polish, make sure your nails are healthy. This means:
- Keep your nails moisturized
- Avoid too much water
- Don’t use your nails as tools
Base Coat Importance
A good base coat is vital for a lasting manicure. It helps:
- Protect your nails from stains
- Make a smooth surface for polish
- Help polish stick better
By following these steps and using the right products, you can get classy holiday nails that will wow everyone.
Classy Holiday Nails Christmas: Elegant Designs That Stand Out
Elegant nail designs are essential for the holiday season. I’m sharing my top picks for classy holiday nails. It’s important to know what makes a design classy and sophisticated.
What Makes a Nail Design “Classy”
A classy nail design is all about understated elegance. It’s about choosing a palette that exudes sophistication. A classic red or burgundy shade is always a timeless choice for the holiday season.
To elevate your nail game, consider metallic or shimmer finishes. These add a touch of luxury and can instantly make your nails stand out at any holiday gathering.
Balancing Festivity with Sophistication
Balancing festivity with sophistication is key to creating classy holiday nails. One way to achieve this balance is by pairing bold, festive colors with more subdued accents. For example, a bright red base color can be paired with subtle gold or silver accents for a look that’s both festive and elegant.
| Design Element | Festive Option | Sophisticated Option |
|---|---|---|
| Color | Bright Red | Burgundy |
| Accent | Glitter | Metallic Gold |
| Pattern | Candy Cane Stripes | Subtle Snowflakes |
My Favorite Inspirations This Season


This season, I’m drawn to designs that blend traditional holiday elements with modern twists. From celebrity holiday nail trends to runway-inspired looks, there’s no shortage of inspiration to be found.
Celebrity Holiday Nail Trends
Celebrities often set the tone for holiday nail trends, and this season is no exception. Look to stars like Jennifer Lopez and Kylie Jenner for inspiration, as they frequently showcase stunning holiday nail designs on their social media accounts.
Runway-Inspired Festive Looks
The runways are another great source of inspiration for classy holiday nails. Designers often incorporate bold, festive colors and patterns into their nail designs, which can be adapted to create elegant, sophisticated looks.
By incorporating these elements and inspirations into your nail design, you can create a look that’s both classy and festive. Whether you’re attending a holiday party or simply want to get into the seasonal spirit, elegant nail designs are sure to make a statement.
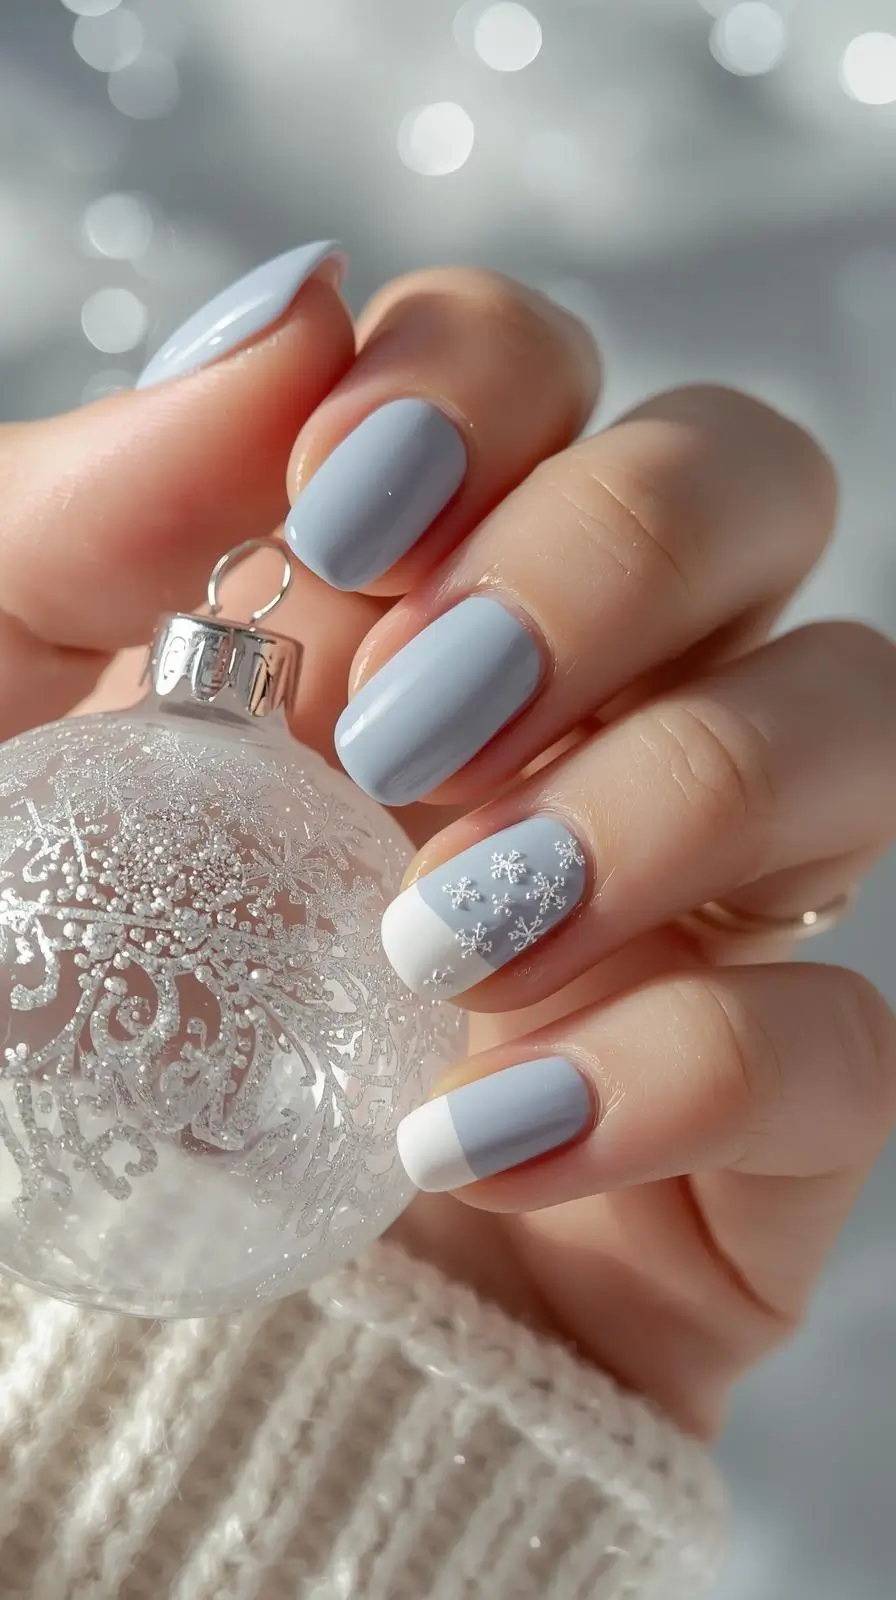
Design 1: Minimalist Snowflake Accent Nails
Minimalist snowflake accent nails are a chic and understated way to add some holiday flair to your look this Christmas. This design combines the elegance of a simple manicure with the festive touch of snowflake accents. It’s perfect for the holiday season.
Color Scheme and Materials
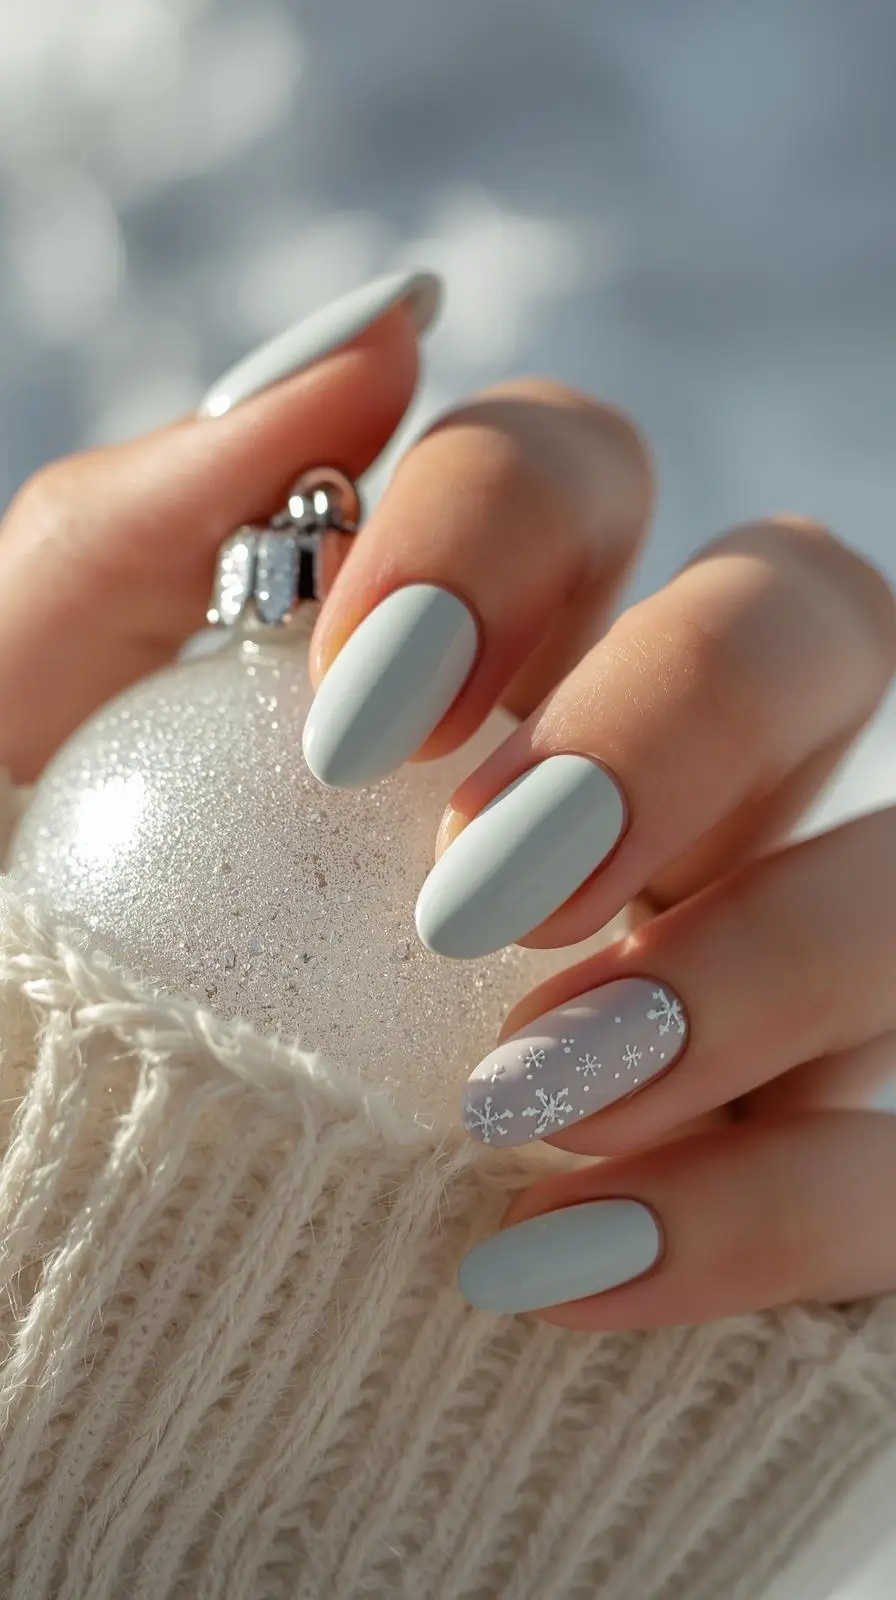
For a minimalist snowflake accent nail design, start with a neutral or winter-inspired color palette. Use a soft white or pale blue as your base color to evoke a sense of snow and winter wonder. For the snowflake accents, you’ll need a fine nail art brush and some white or metallic nail polish.
The materials required for this design include:
- A base coat to protect your nails
- A neutral or pale blue/white base color
- White or metallic nail polish for the snowflakes
- A fine nail art brush
- A top coat to seal your design
| Material | Purpose |
|---|---|
| Base Coat | Protects the nail |
| Neutral/Pale Blue or White Base Color | Provides a winter-inspired background |
| White or Metallic Nail Polish | Used for creating snowflake accents |
| Fine Nail Art Brush | Essential for detailed snowflake designs |
| Top Coat | Seals the design and adds shine |
Step-by-Step Application Guide
To achieve this look, follow these steps:
- Apply a base coat to protect your nails.
- Paint two coats of your chosen base color.
- Using a fine nail art brush and white or metallic nail polish, carefully paint a snowflake design onto one or two accent nails.
- Seal your design with a top coat.
Creating the Perfect Snowflake
To create a delicate snowflake, start by painting a small dot in the center of your nail. Then, using your fine brush, carefully draw out six symmetrical arms from the center dot. You can simplify this process by using nail guides or stickers if you’re new to nail art.
Placement Tips for Accent Nails
For a minimalist look, consider accenting just one or two nails with your snowflake design. Typically, the ring finger or index finger is a good choice for the accent nail. It draws attention without overwhelming the overall manicure.
Perfect Occasions for This Design
This minimalist snowflake accent nail design is versatile and suitable for various holiday events. It’s perfect for:
- Christmas parties
- Family gatherings
- New Year’s Eve celebrations
- Everyday holiday wear for those who like to keep their nail design subtle yet festive
By incorporating this design into your holiday look, you’ll add a touch of elegance and festivity that’s sure to be appreciated.
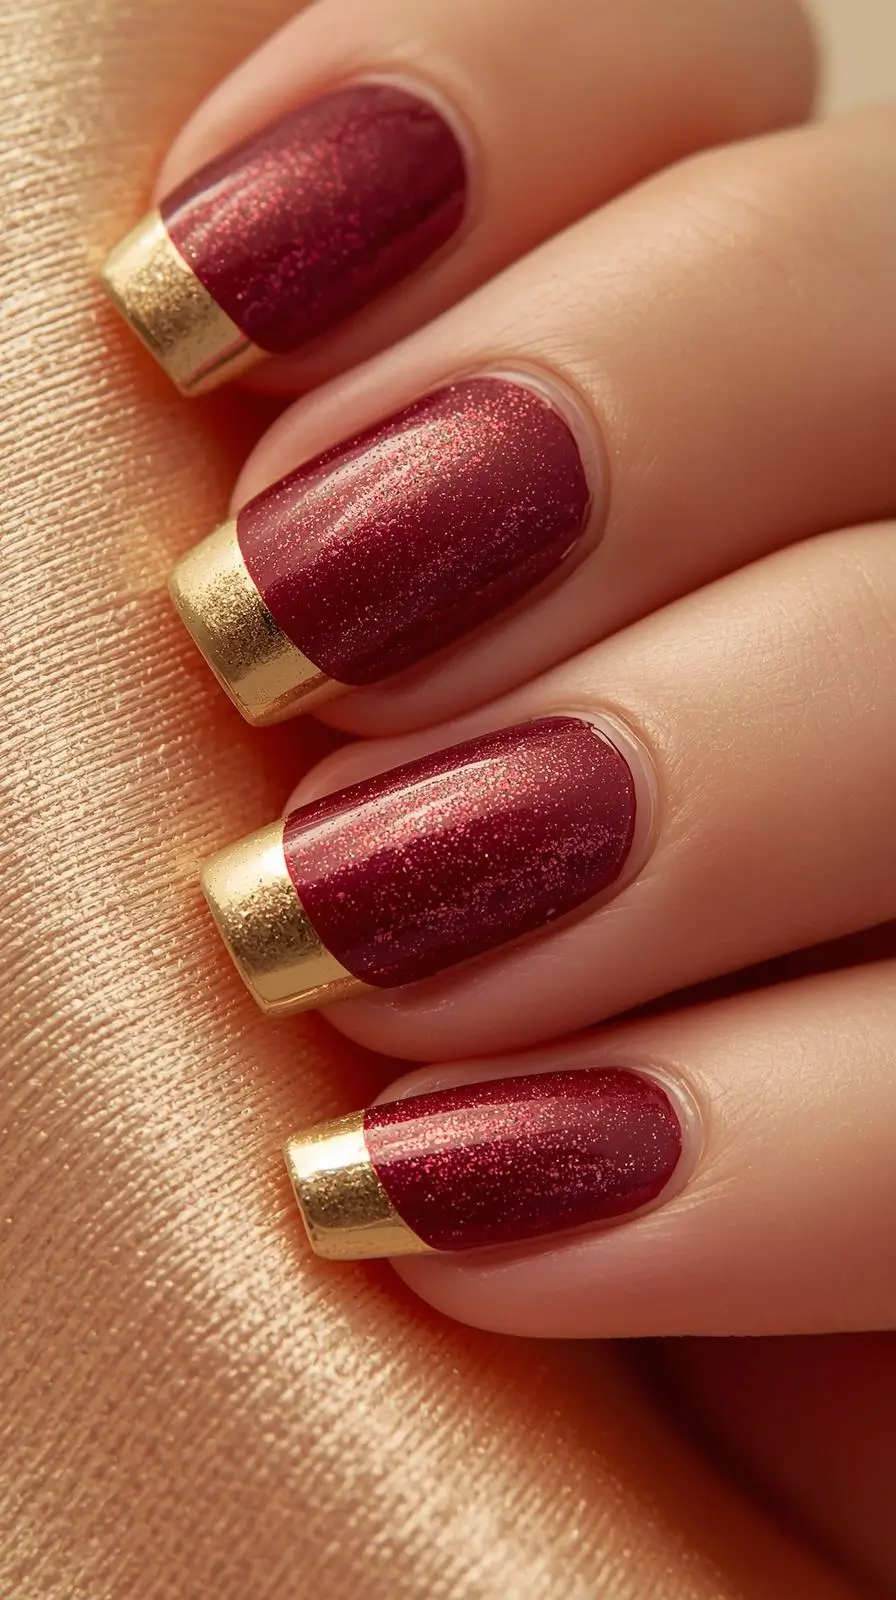
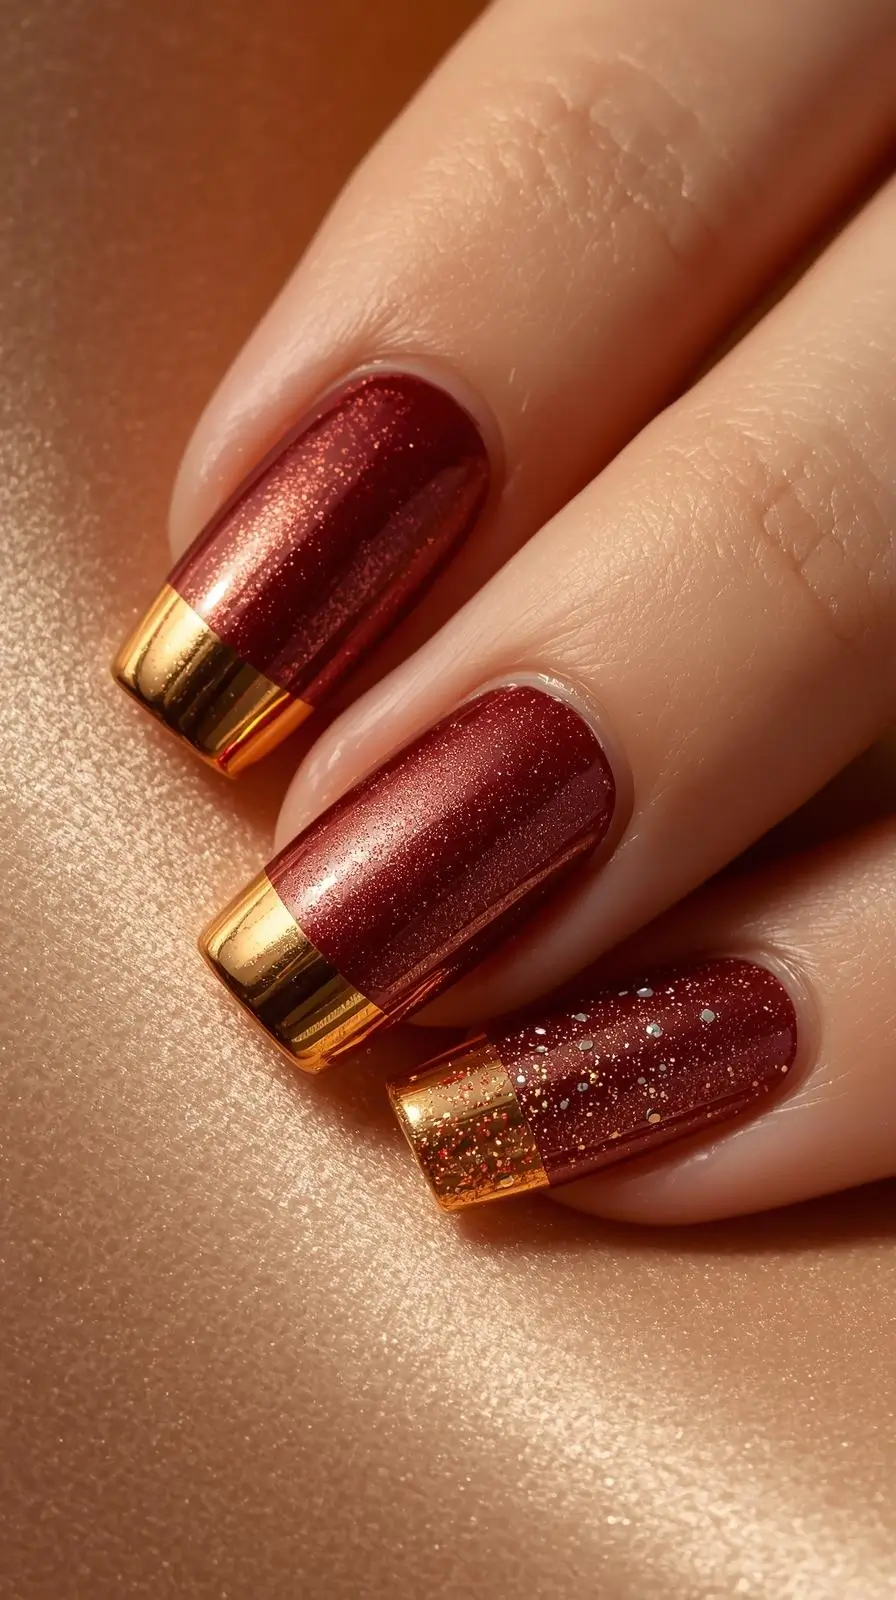
Design 2: Subtle Shimmer and Metallic French Tips
Elevate your holiday nail game with a design that combines understated shimmer and metallic accents. This look is perfect for those who want to add a touch of sophistication to their holiday manicure.
Color Scheme and Materials
For this design, you’ll need a palette that includes metallic shades and subtle shimmers. Consider using:
- A metallic silver or gold for the French tips
- A soft, shimmery red or burgundy for the nail base
- A clear topcoat with fine glitter for added shimmer
Key materials include a nail polish in your chosen metallic shade, a shimmery base coat, and a fine glitter topcoat.
Step-by-Step Application Guide
To achieve this look, follow these steps:
- Prep your nails with a base coat
- Apply a shimmery red or burgundy polish as the base color
- Use a metallic polish to create the French tips
- Finish with a clear topcoat containing fine glitter for added shimmer
Mastering the Perfect French Tip
To get the perfect French tip, use a nail guide or a steady hand. Practice makes perfect, so don’t be discouraged if it takes a few tries to get it right.
Adding Holiday Shimmer Elements
For an extra festive touch, consider adding a few shimmering elements to your design. This could be a sprinkle of glitter on top of the metallic French tips or a shimmery accent nail.
Perfect Occasions for This Design
This design is ideal for:
- Holiday parties
- Family gatherings
- Formal events where you want to make a statement
The subtle shimmer and metallic French tips are versatile enough to complement any holiday outfit.
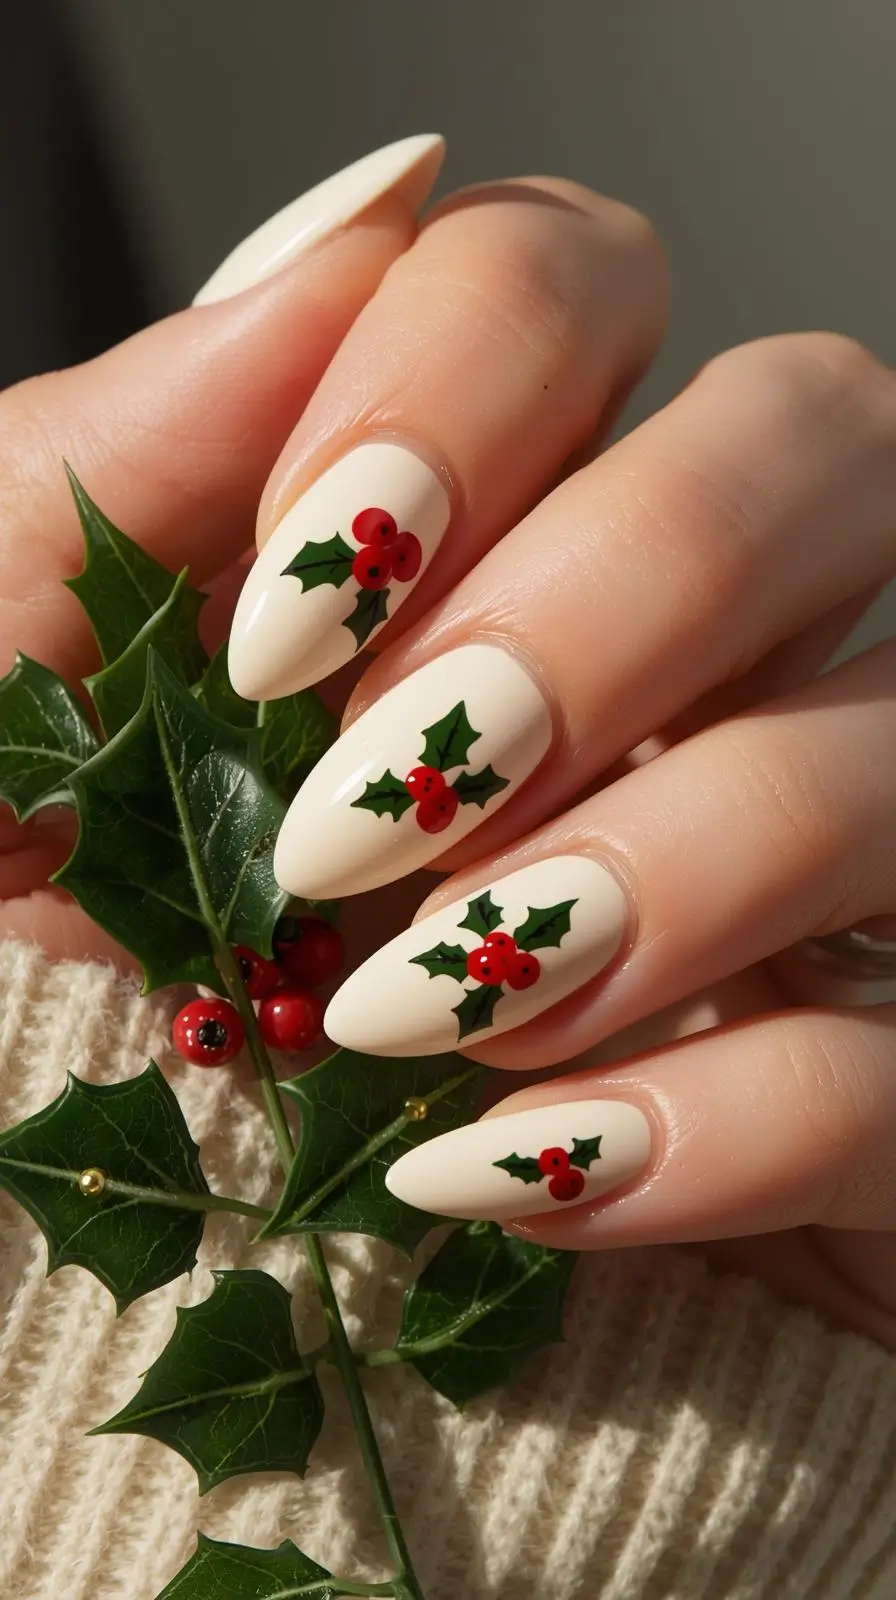
Design 3: Elegant Holly Berry Inspired Nails
This season, take your nail game to the next level with holly berry inspired nails. This classic holiday look is both festive and sophisticated. It’s perfect for all your Christmas celebrations.
Color Scheme and Materials
To get this look, you’ll need deep reds, rich greens, and gold accents. Start with a base coat, then a red or green polish for the main color. Use bright red gel or acrylic paint for the holly berries.
You’ll also need a fine brush for details and green polish or paint for the leaves.
Step-by-Step Application Guide
Start with a base coat to protect your nails. Next, apply two coats of your main color. Use a fine brush to paint small holly leaves and berries on accent nails.
Creating Delicate Holly Leaves
To make delicate holly leaves, use a fine brush with green polish or acrylic paint. Paint small, pointed oval shapes, leaving space for berries. Add texture by drawing a line down the center with a nail art tool.
Perfecting Berry Accents
For berry accents, use bright red gel or acrylic paint for small dots. Cluster these dots to look like holly berries. Seal your design with a top coat to last all holiday season.
Perfect Occasions for This Design
Elegant holly berry inspired nails are great for many holiday events. They’re perfect for family gatherings and formal Christmas parties. The red and green colors are festive, and the design is elegant.
By following these steps and using the right materials, you can create a beautiful nail design. It captures the holiday season’s essence perfectly.
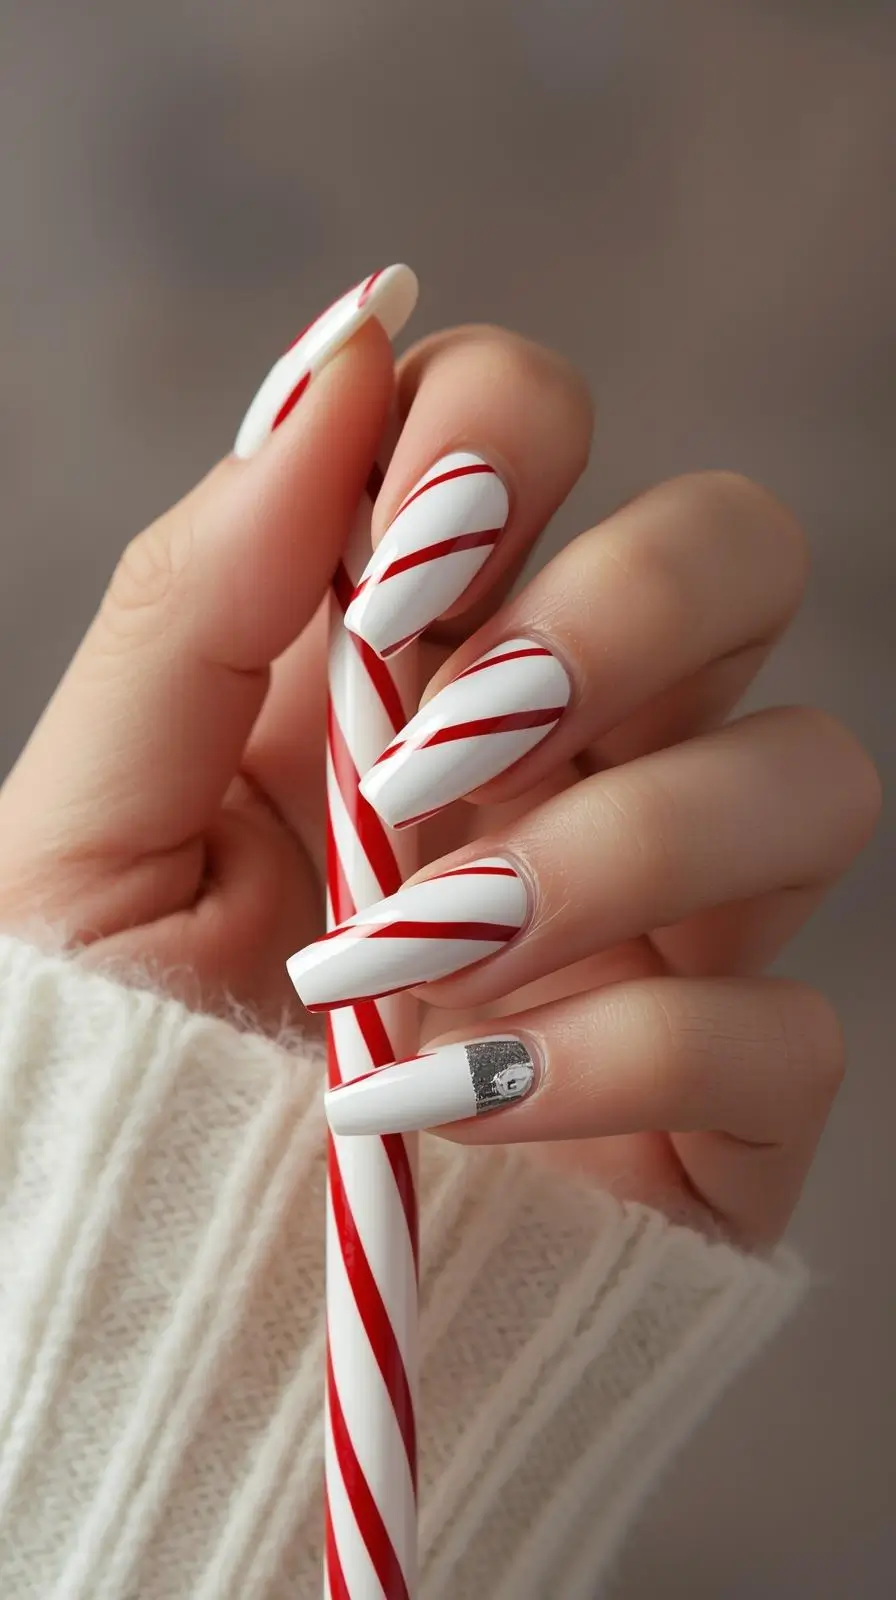
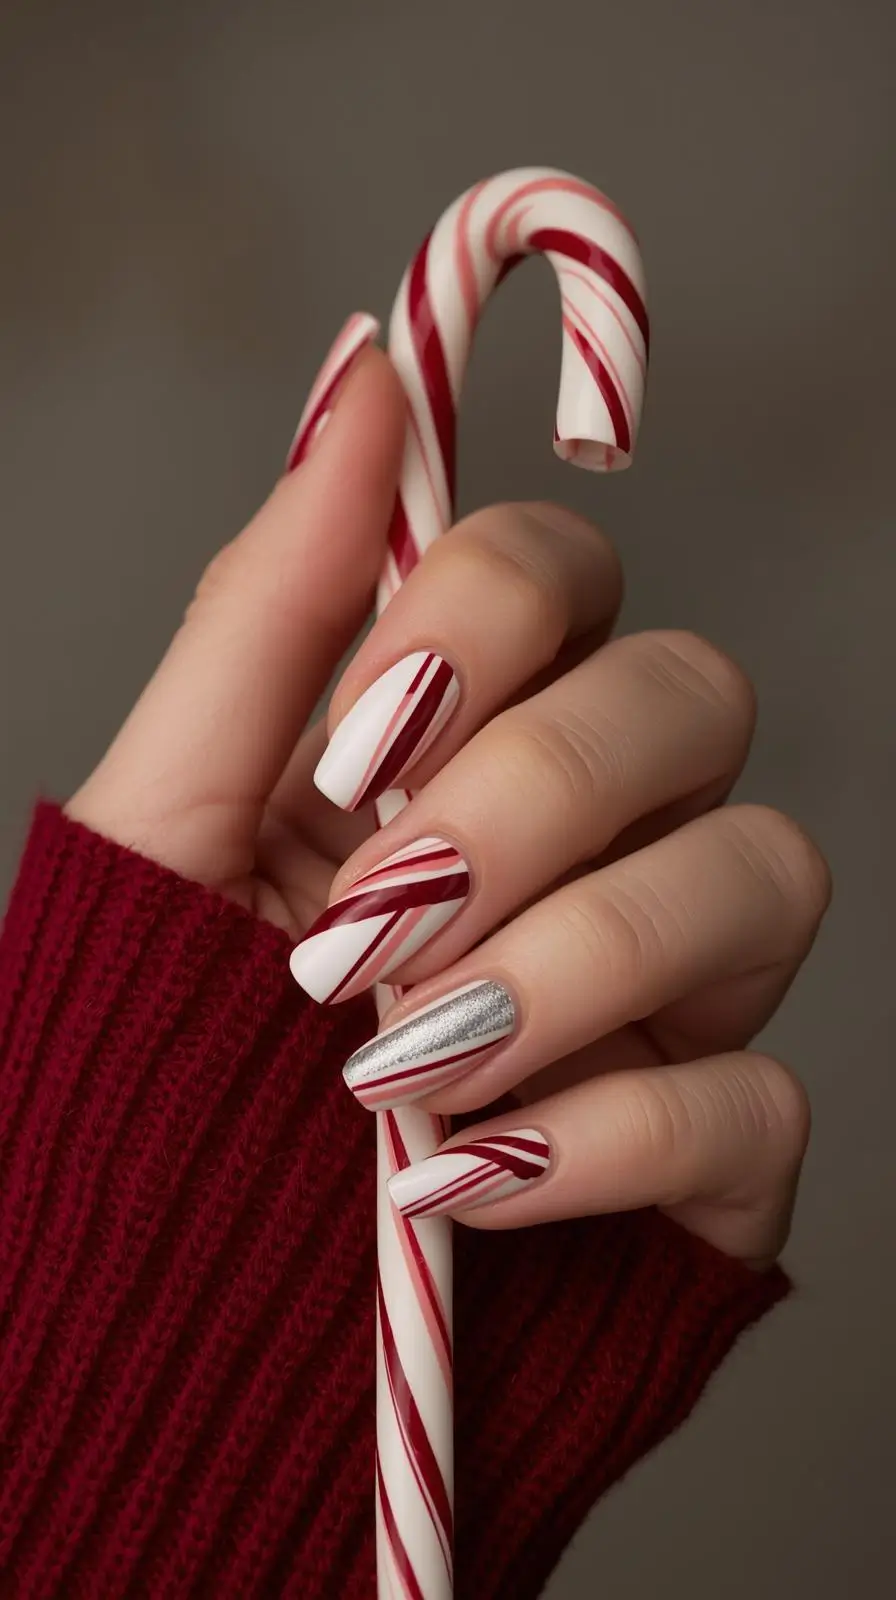
Design 4: Sophisticated Candy Cane Stripes
Candy cane stripes are a classic holiday look. They can be made sophisticated with the right techniques. This design uses traditional red and white colors with a modern twist. It’s perfect for the holiday season.
Color Scheme and Materials
To start, apply a crisp white base coat. Use a deep red polish for the stripes. Add metallic silver or gold for a luxurious touch. You’ll need a striping brush or tape for clean lines.
Step-by-Step Application Guide
First, apply a white base coat to all nails. Then, use striping tape or a brush to draw the stripes. If using tape, paint over it with red polish. Remove the tape for clean lines.
Techniques for Clean Stripes
For precise stripes, use the right tools. A striping brush is good for freehand, while tape gives sharp edges. It might take practice to get it right.
Modern Twists on the Classic Pattern
To update the classic design, add a metallic stripe or vary the stripe widths. Try different colors like pastels or brights for a fresh look.
Perfect Occasions for This Design
Sophisticated candy cane stripes are great for many holiday events. Wear them to Christmas parties or family gatherings. They add elegance to your holiday style.
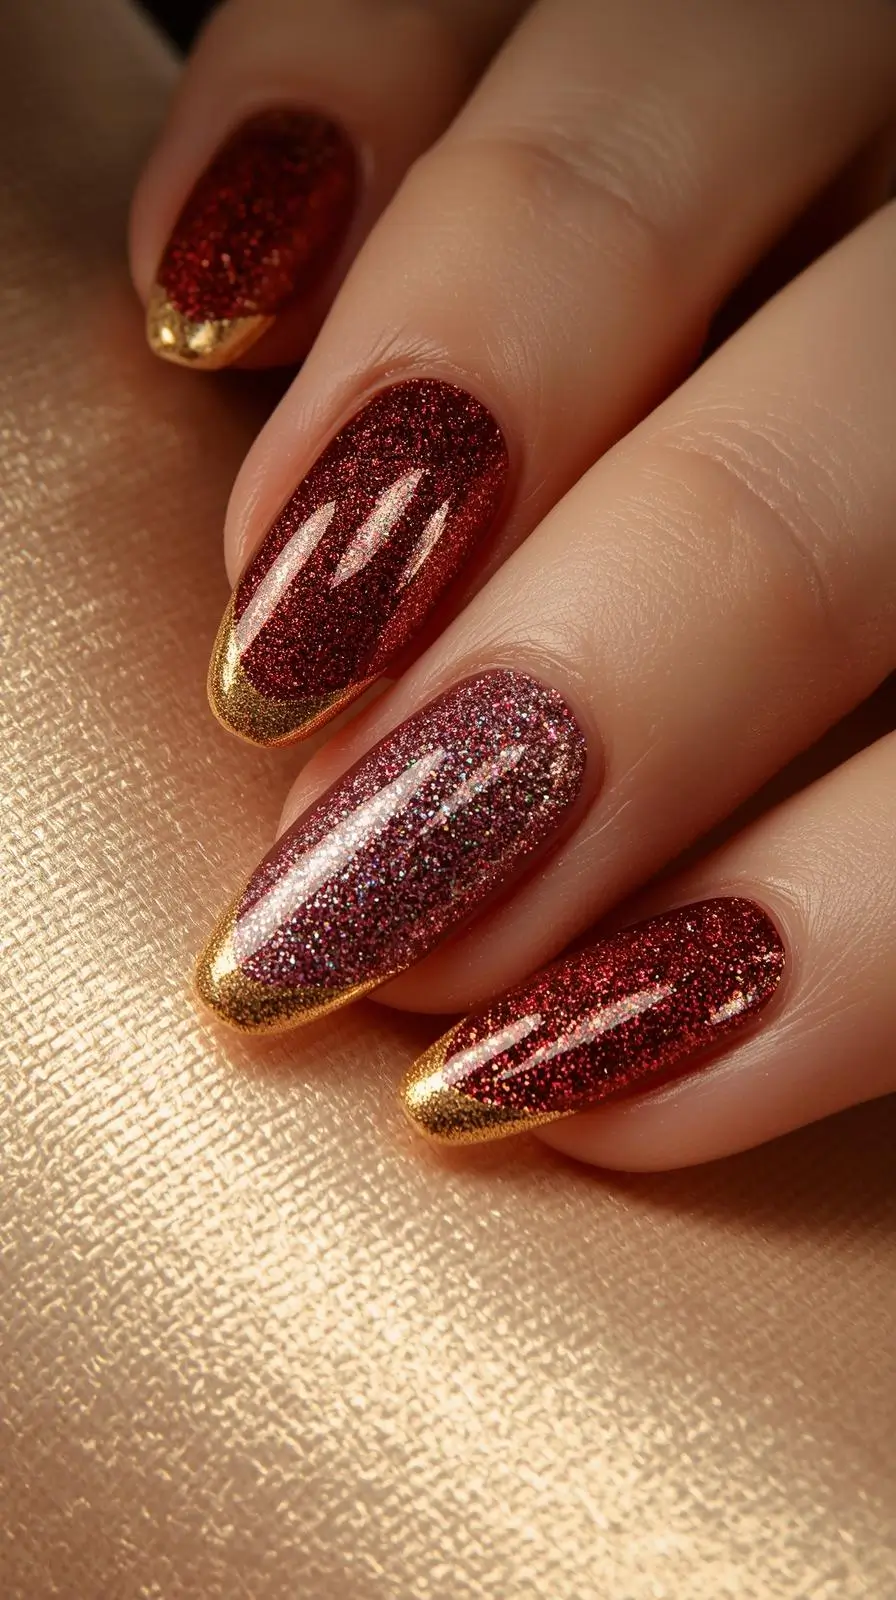
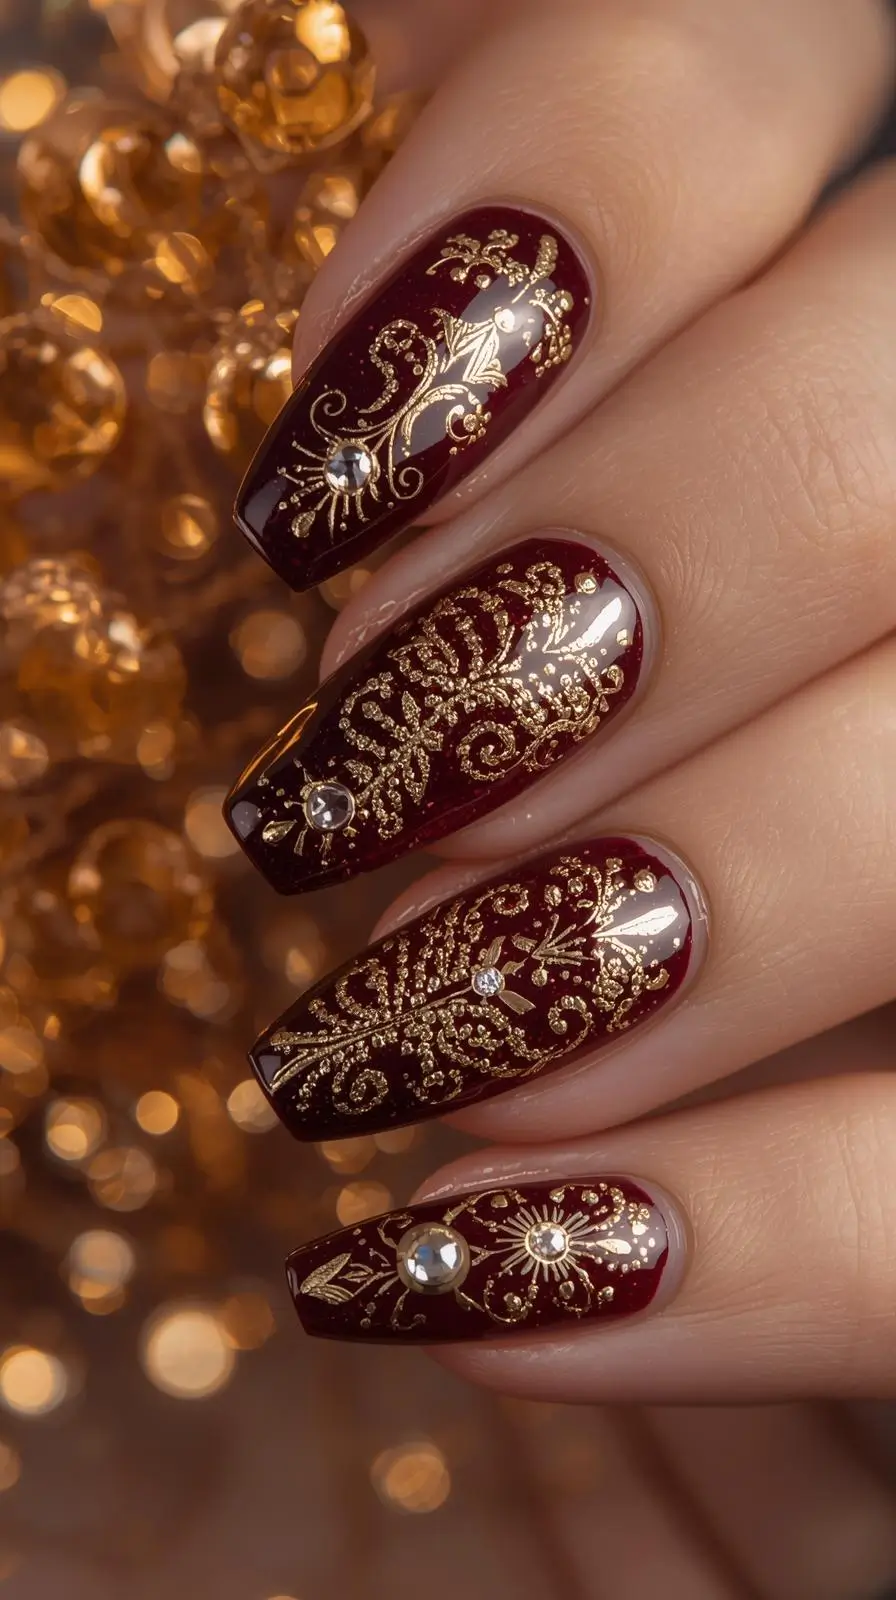
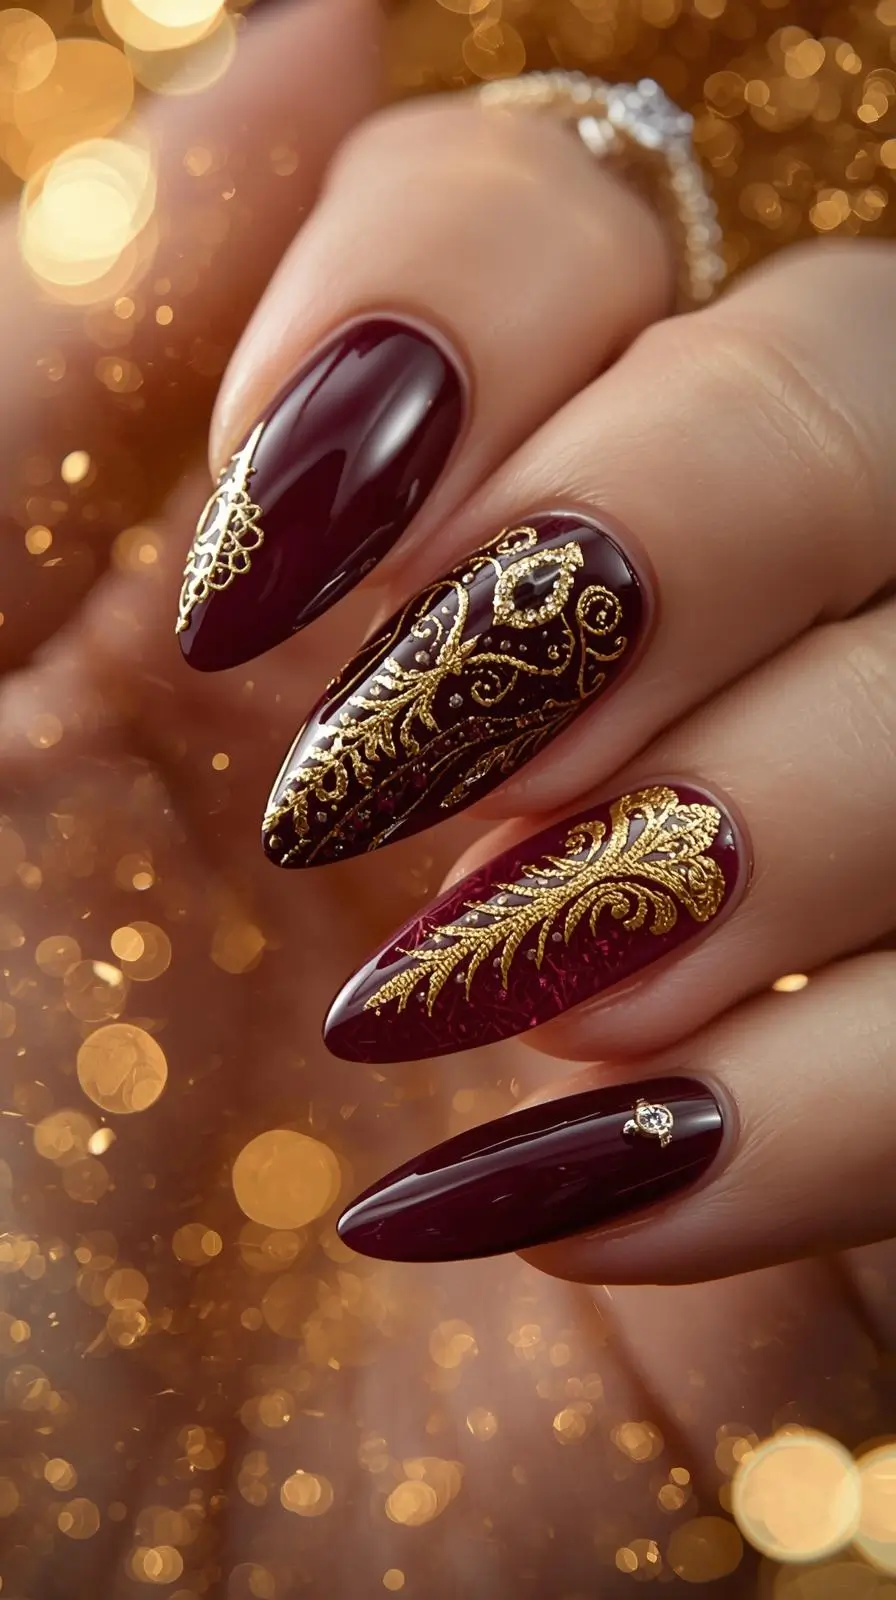
Design 5: Luxe Gold and Burgundy Ornament Nails
This season, make a statement with luxe gold and burgundy ornament nails. They exude elegance. This design combines the richness of burgundy with the opulence of gold, creating a luxurious holiday manicure.
Color Scheme and Materials
The luxe gold and burgundy ornament nails feature a deep burgundy base color. They are adorned with gold details. To achieve this look, you’ll need:
- A burgundy gel or nail polish
- Gold metallic polish or gel
- Nail art brushes
- A top coat for sealing
The key to this design is the contrast between the deep, rich burgundy and the luxurious gold accents.
Step-by-Step Application Guide
To create this stunning design, follow these steps:
- Apply a base coat to protect your nails.
- Paint two coats of burgundy polish, allowing the first coat to dry completely.
- Using a nail art brush, paint gold ornament details on top of the burgundy base.
- Seal the design with a top coat.
Creating Ornament Details
To add the ornament details, use a fine nail art brush and gold metallic polish. You can freehand the designs or use nail guides for more precision.
Tip: Practice makes perfect. If you’re new to nail art, consider practicing the ornament details on a nail wheel before applying them to your actual nails.
Working with Metallic Polishes
Metallic polishes can be tricky to work with, but here are a few tips to make the process easier:
- Use a thin brush to paint fine details.
- Apply thin coats, allowing each coat to dry before adding more.
- Clean up any smudges immediately with a cotton swab dipped in nail polish remover.
| Material | Purpose | Tips |
|---|---|---|
| Burgundy Polish | Base Color | Apply two coats for deep color |
| Gold Metallic Polish | Ornament Details | Use thin coats and a fine brush |
| Top Coat | Seal the Design | Apply once to prevent smudging |
Perfect Occasions for This Design
The luxe gold and burgundy ornament nails are perfect for formal holiday events. This includes Christmas parties or New Year’s Eve gatherings. The sophisticated design is sure to turn heads and add a touch of luxury to your holiday style.
Make a statement this holiday season with a manicure that’s as elegant as it is festive.
Conclusion
Exploring holiday nail art, we found five classy designs that shine. They range from simple snowflakes to fancy gold and burgundy ornaments. These designs fit any holiday event perfectly.
Classy holiday nails Christmas can make any look better, whether you’re at a party or home alone. I suggest trying these designs and sharing your holiday nail art stories.
With the right tools and creativity, you can make holiday nail art that impresses everyone. So, why not try it and make this holiday season unforgettable?
FAQ
What are the best nail polish colors for a classy holiday look?
For a classy holiday look, try rich jewel tones like emerald green, sapphire blue, and ruby red. Metallic shades like gold, silver, and bronze are also great. Neutral shades like beige, cream, and pale pink offer a more subtle option.
How do I make my holiday nail art last longer?
To extend the life of your holiday nail art, start with a good base coat. Apply thin coats of polish and finish with a top coat. Avoid using your nails as tools and wear gloves for household chores. Regularly moisturize your cuticles.
Can I do holiday nail art at home, or should I go to a salon?
You can do holiday nail art at home with the right tools and practice. But, if you’re short on time or want a detailed design, a salon is a good choice.
What are some popular holiday nail art designs?
Popular designs include snowflakes, holly, candy canes, and ornaments. Adding glitter, rhinestones, and metallic accents can give your nails a festive look.
How do I choose the right holiday nail design for my occasion?
Think about the occasion, your style, and the look you want. A simple design is good for work, while bold designs are great for parties.
What are some tips for creating a classy holiday nail look?
For a classy look, focus on clean lines and simple shapes. Choose elegant colors and avoid too much glitter. Use a bold accent nail and balance it with simpler nails.
How can I incorporate my favorite holiday colors into my nail design?
Start with your favorite color and add complementary shades. For example, pair red with green or gold for a festive look.