

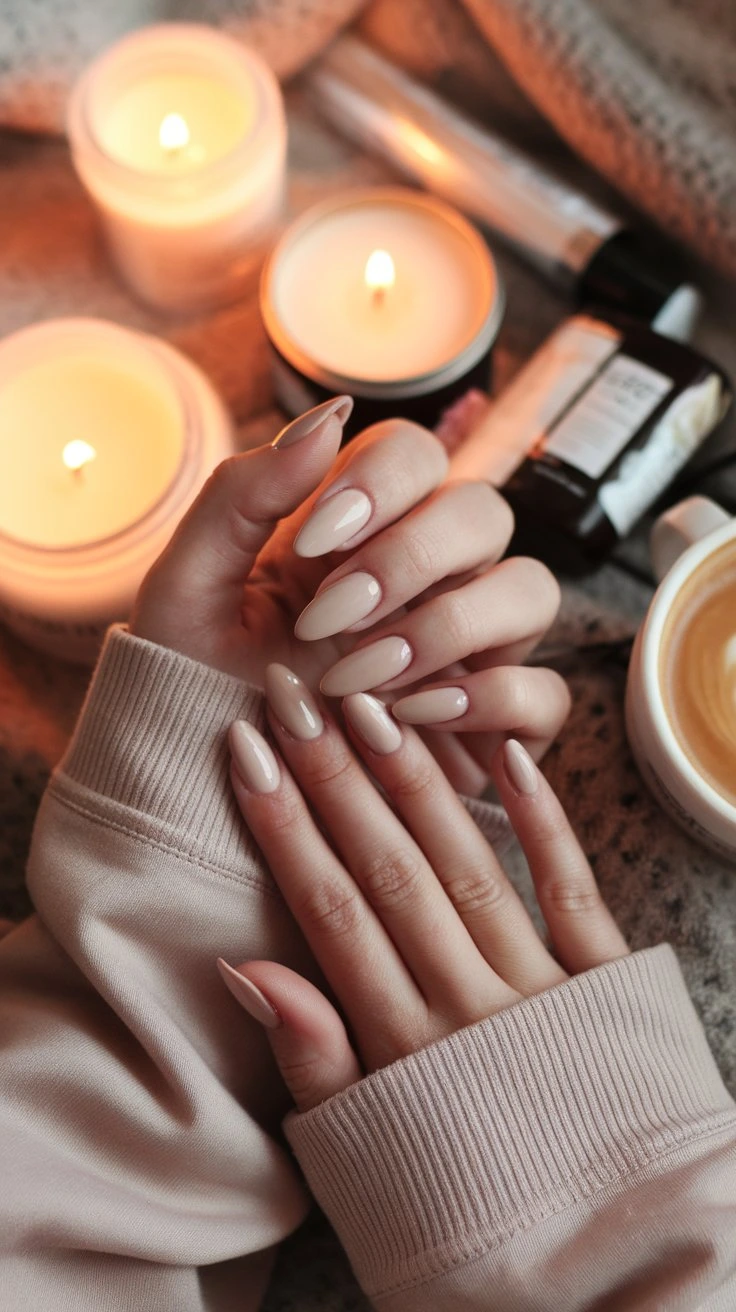
Thinking about my weekend plans, I remember the value of self-care. Trying new nail designs is a great way to relax and prepare for the week. It’s a simple yet effective way to pamper myself.
With the weekend coming, I’m looking forward to some fun and creative nail art ideas. Whether you’re into beauty or just want a fun activity with friends, cute nail designs are perfect. They’re a great way to unwind and show your creativity.
Trying new nail designs is a great way to care for yourself over the weekend. Let’s explore cute nail designs and find inspiration for your next nail art adventure!
Key Takeaways
- Discover the latest trends in nail designs
- Learn how to incorporate self-care into your weekend routine
- Find inspiration for your next nail art session
- Get tips on how to make the most of your downtime
- Explore fun and creative ideas for nail designs
Why Nail Art Is My Weekend Self-Care Ritual
Painting my nails brings me calm, starting my weekend self-care. In today’s world, we need to relax and recharge. Nail art is my way to do that, letting me forget worries and express myself.
Nail art is more than a hobby; it’s self-pampering and exploring my creativity. Preparing my nails and choosing colors is therapeutic. It’s my favorite weekend activity, making me feel refreshed for the week ahead.
Benefits of DIY Manicures
I love nail art for its DIY manicure benefits. It’s affordable, letting me get salon-quality nails at home. Plus, I can pick any color or design, making each manicure unique.
DIY manicures let me try new techniques and trends. This keeps my nail art fresh and fun. It makes my self-care ritual even more enjoyable.
How I Got Started with Nail Art
I started nail art for a special occasion, wanting cute nails. I began with simple designs and grew to more complex ones. It was a learning curve, but it was worth it.
I bought a basic kit and watched tutorials to learn. The more I practiced, the more I loved it. Now, nail art is a big part of my weekends, mixing relaxation with creativity.
Essential Tools and Materials for DIY Nail Art
To start with DIY nail art, you need some basic tools and materials. The right tools make the process easier and help your nail art look professional. They also make your design last longer.
Basic Tools Every Nail Artist Needs
As a beginner, start with the basics. Here are the essential tools you’ll need:
Nail Files and Buffers
Nail files and buffers are key for shaping and smoothing your nails. They come in different grits for customizing your nail shape and finish. Investing in quality nail files and buffers is important for a great look.
Cuticle Tools
Cuticle tools, like pushers and nippers, are vital for healthy cuticles. They help keep your cuticles clean and neat. Proper cuticle care is essential for a professional manicure.
Quality Brushes
Quality brushes are a must for nail artists. They come in various sizes and shapes for different designs. Good quality brushes help you achieve smooth coats and detailed designs.
| Tool | Description | Importance |
|---|---|---|
| Nail Files and Buffers | Shape and smooth nails | High |
| Cuticle Tools | Maintain healthy cuticles | High |
| Quality Brushes | Create smooth, even coats and designs | High |
Specialty Items for Advanced Designs
Once you’ve got the basics down, try specialty items for advanced designs. This includes nail art brushes, dotting tools, and stencils. Experimenting with different tools and techniques helps you find your style.
Quality Polishes and Top Coats
Quality polishes and top coats are key for a long-lasting finish. Choose polishes that are rich in pigment and smooth. A good top coat seals in your design and adds shine.


Preparing Your Nails for the Perfect Manicure
To get a salon-quality manicure at home, start with the right nail prep. A clean and shaped nail surface is key for a lasting and healthy cute nail look.
Proper Nail Cleaning and Shaping
First, clean and shape your nails before polish. Remove old polish with a gentle acetone-based remover. Then, wash your hands to get rid of oils and residue.
Use a nail clipper to shape your nails. Then, buff the surface to smooth out ridges.
| Nail Shaping Tool | Purpose |
|---|---|
| Nail Clippers | Trim and shape nails |
| Nail File | Smooth out nail edges |
| Nail Buffer | Gently buff the nail surface |
Base Coat Application Tips
Applying a base coat is vital in your nail care routine. It protects your nails from stains and helps polish apply smoothly. Pick a base coat that fits your nail type and apply a thin layer to each nail.
By following these steps, you can get a pro-looking manicure at home. Remember, a good base coat is key for a lasting finish.
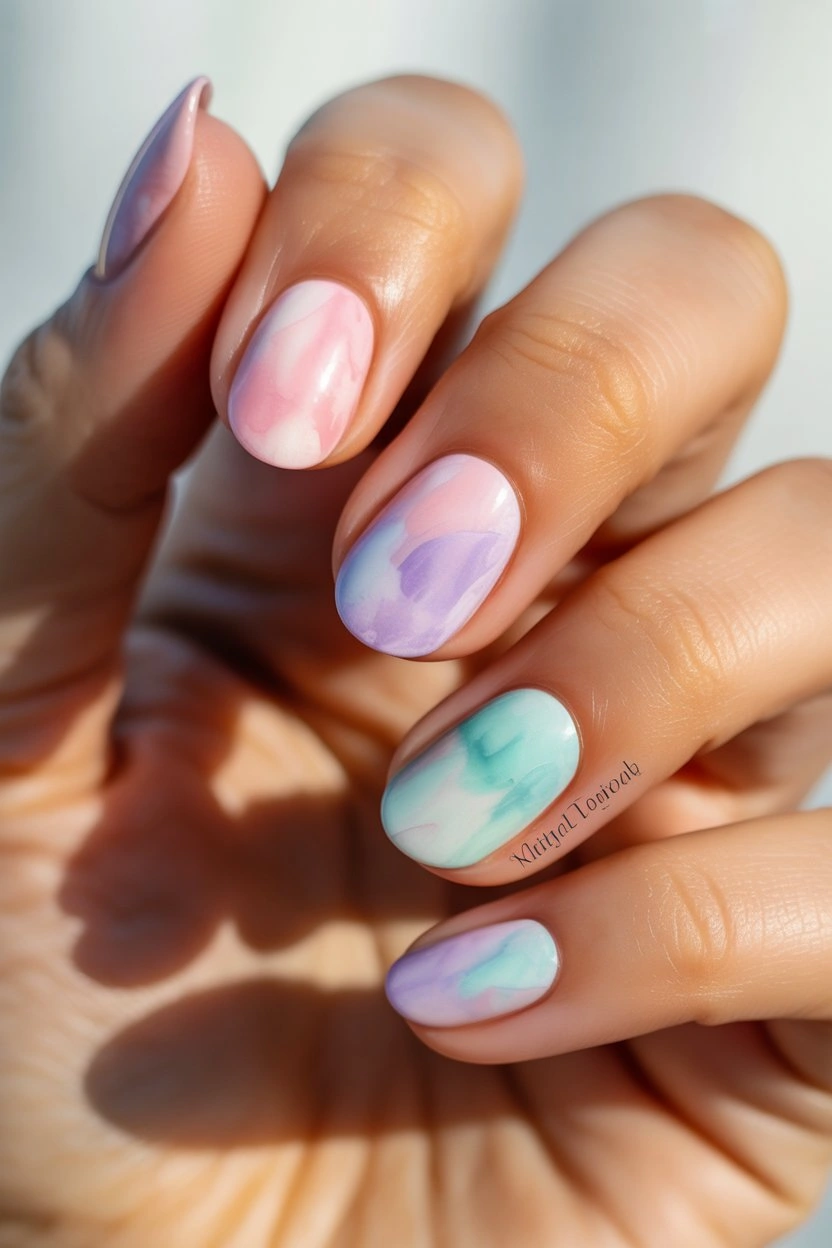
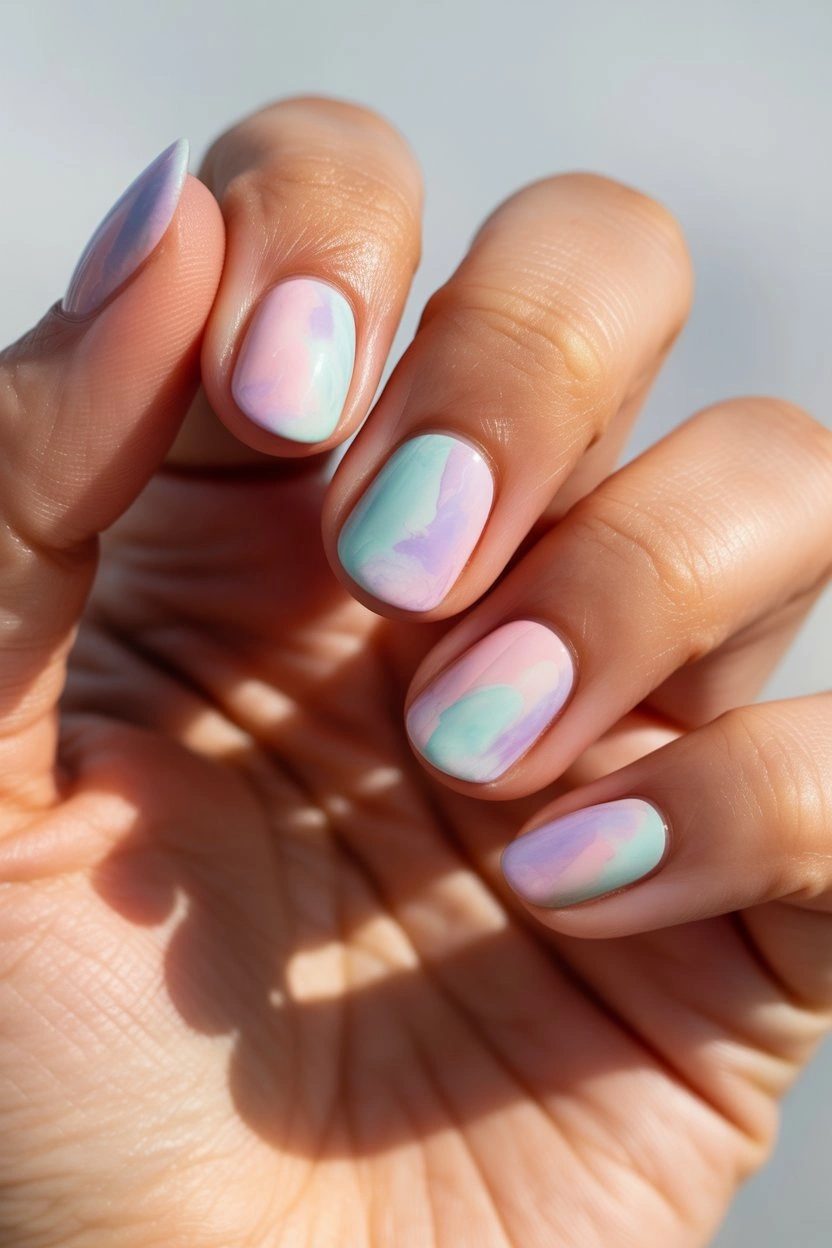
Pastel Watercolor Cute Nail Design
Explore the world of pastel watercolor nail art. It’s a mix of soft colors and artistic flair. This cute nail design is great for those who want elegance and fun in their nails.
Materials Needed
To make this stunning pastel watercolor nail design, you’ll need a few things. These include:
- Pastel-colored nail polishes
- A watercolor nail art brush
- A makeup sponge
- A base coat and top coat
- Nail cleanser and lint-free wipes
Step-by-Step Tutorial
Doing a nail tutorial-style manicure at home is simple. Here’s how to do it:
- Start by applying a base coat to protect your nails and help the polish stick.
- Put a light pastel shade on as the base color and let it dry fully.
- Soak your watercolor nail art brush with a bit of water.
- Take a small amount of pastel polish on the brush and dab it on your nail.
- Blend the colors with a makeup sponge for a soft, watercolor look.
- Keep adding different pastel shades to get the color mix you want.
- End with a top coat to seal your design and add shine.
Color Combination Suggestions
One of the best things about pastel watercolor nail art is trying out different color mixes. Here are some ideas:
- Soft pink, lavender, and mint for a romantic look
- Pale peach, baby blue, and yellow for a cheerful vibe
- Lilac, powder blue, and white for a whimsical feel
Don’t be afraid to mix these colors or add your own twist. Create a nail design that shows off your personality.
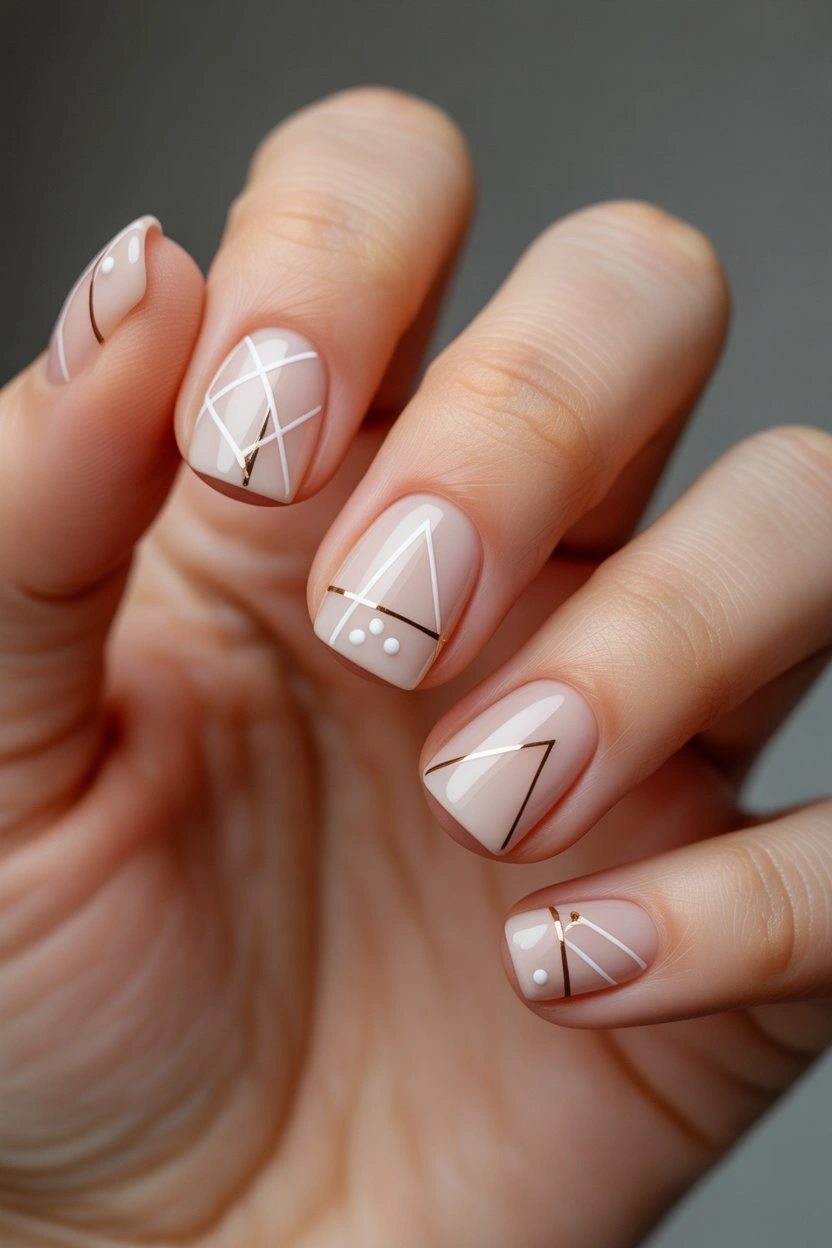
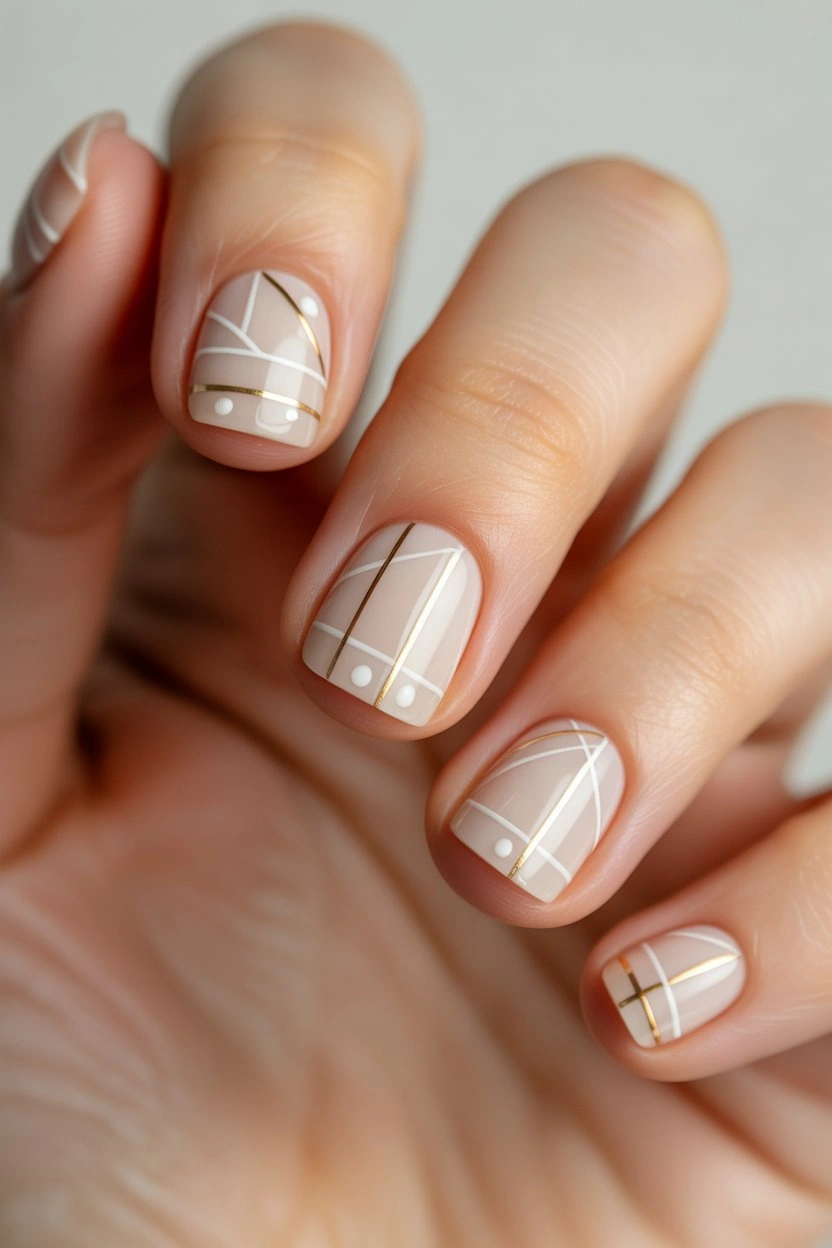
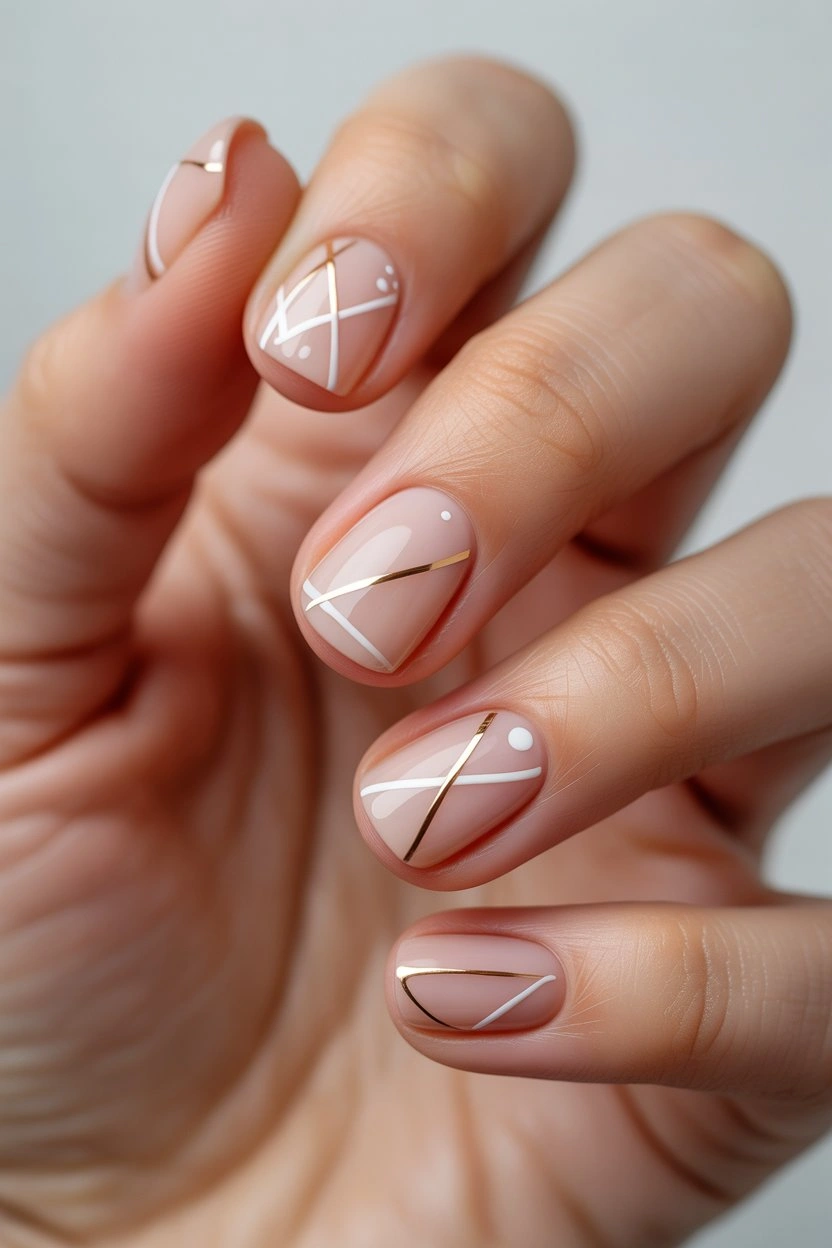
Minimalist Geometric Designs
Exploring nail art, I see that minimalist geometric designs are always sleek and modern. They’re great for those who love clean lines and simple patterns.
Materials Needed
To make a minimalist geometric nail design, you’ll need a few things. You’ll need a nail polish in your favorite color, a nail art brush, and a dotting tool or toothpick for dots and lines. Don’t forget a base and top coat for a lasting finish.
Step-by-Step Tutorial
Begin with a base coat to protect your nails. Then, apply two coats of your chosen polish color. Let the first coat dry before adding the second. Use a brush to paint geometric shapes like triangles or chevrons on your nails.
For detailed designs, mix lines and dots. Start simple and add more details as you get better. End with a top coat to seal and shine your design.
Variations to Try
To spice up your designs, try different colors and patterns. Use one color for a subtle look or mix shades for a bold statement. Add metallic or glitter for extra sparkle.
Play with various shapes, like hexagons or squares, or leave some nail areas bare for a negative space effect. The secret to a beautiful minimalist design is simplicity and elegance.
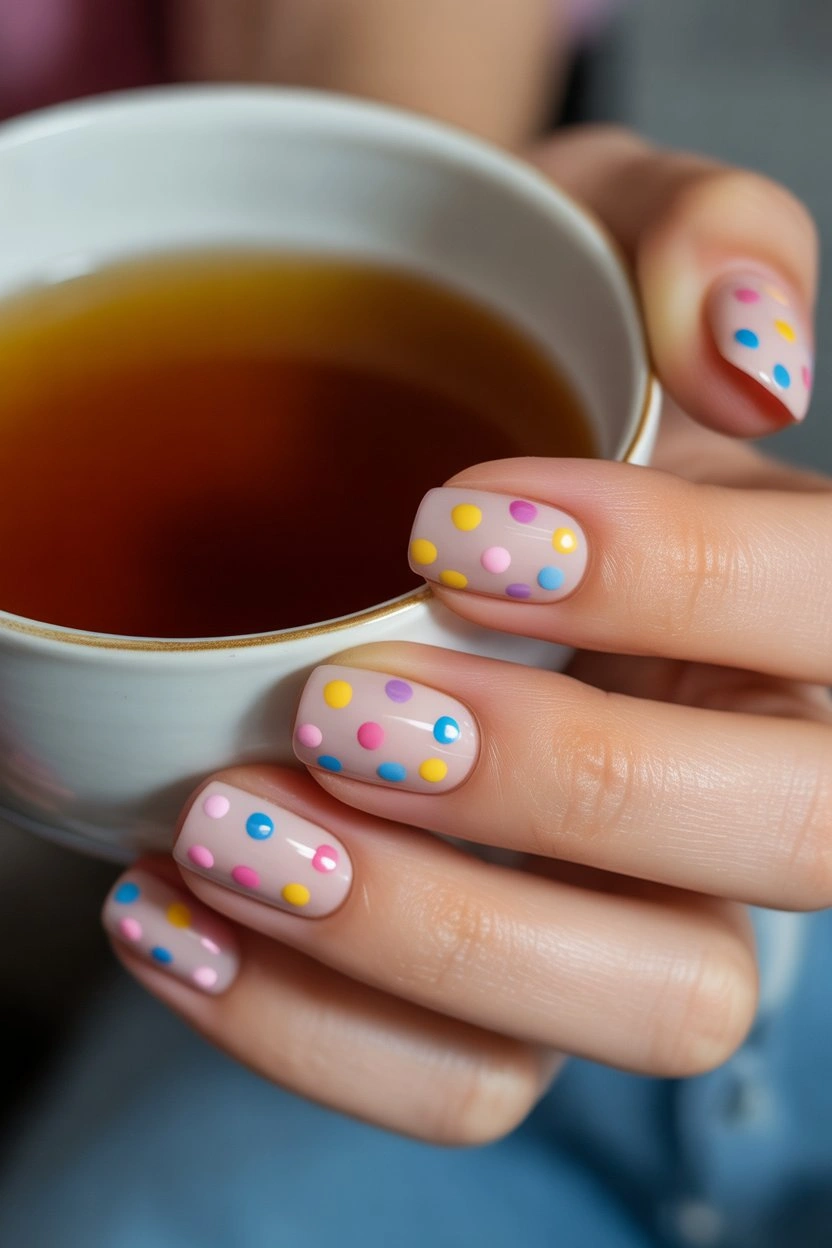
Polka Dot Patterns for Playful Nails
Polka dots are a timeless and versatile nail art design. They can instantly elevate your manicure game. I’ve always loved adding a playful touch to my nails, and polka dots are my go-to for a cute and stylish look.
Polka dot nail art is simple. With basic tools and creativity, you can make various designs for any occasion. Whether it’s a summer barbecue or just a fun everyday look, polka dots are perfect.
Materials Needed
To start with polka dot nail art, you’ll need a few basic items. These include:
- A base coat to protect your nails
- A nail polish color of your choice for the background
- A dotting tool or a toothpick for creating the dots
- A top coat to seal in your design
For a more detailed design, use multiple colors and try different dotting techniques.
Step-by-Step Tutorial
Creating polka dot nail art is easy. Here’s a simple guide to get you started:
- Apply a base coat to protect your nails and promote polish adhesion.
- Paint two coats of your chosen background color, allowing the first coat to dry completely before applying the second.
- Using a dotting tool or a toothpick, create dots on your nails by dipping the tool into your chosen polish color and gently pressing it onto the nail.
- Experiment with different dot sizes and spacing to create a unique design.
- Finish with a top coat to seal in your design and add shine.
Creative Dot Arrangements
One of the fun aspects of polka dot nail art is the ability to get creative with your dot arrangements. You can create a random pattern, or you can get more structured and create designs like:
- A gradient effect by varying the size or color of the dots
- A symmetrical design by mirroring the dots on each nail
- A themed design by using specific colors or patterns that match your personal style or the occasion
By experimenting with different dot arrangements, you can create a truly unique and playful nail design that reflects your personality.
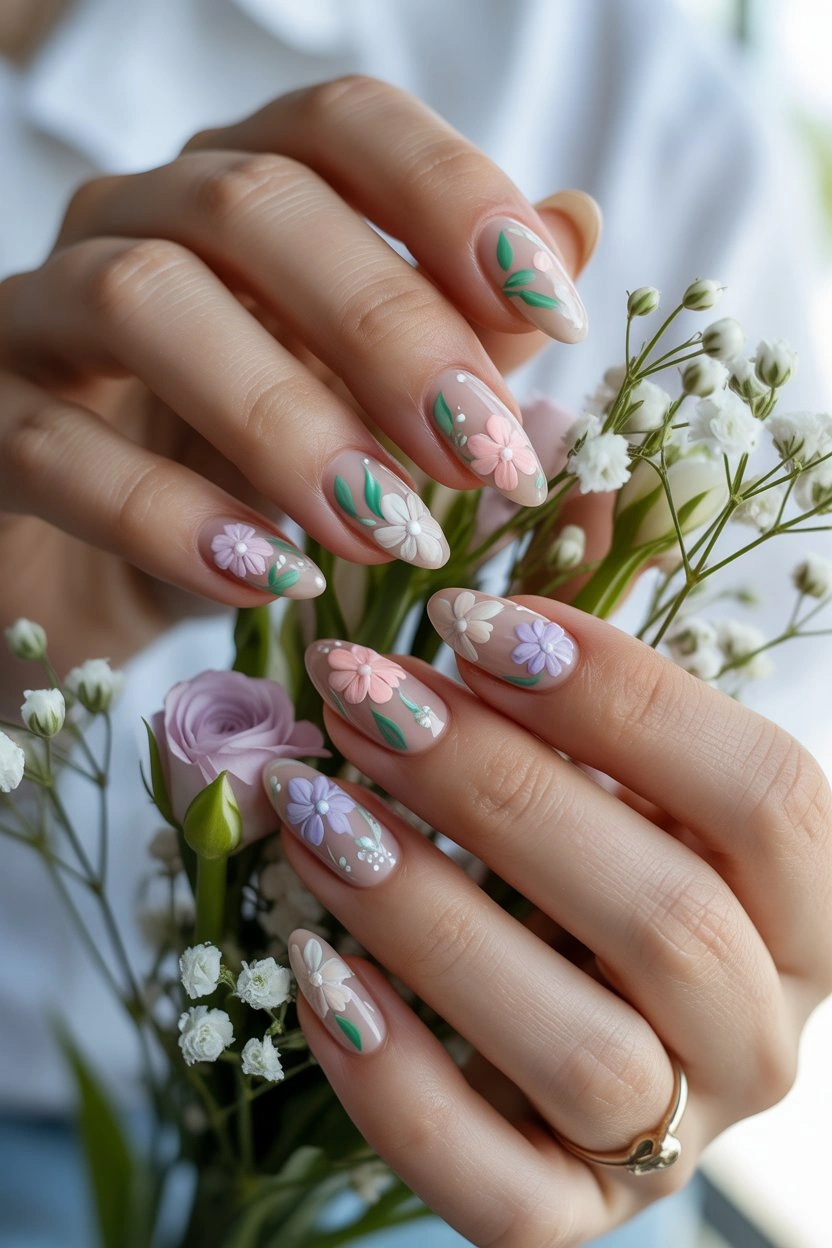
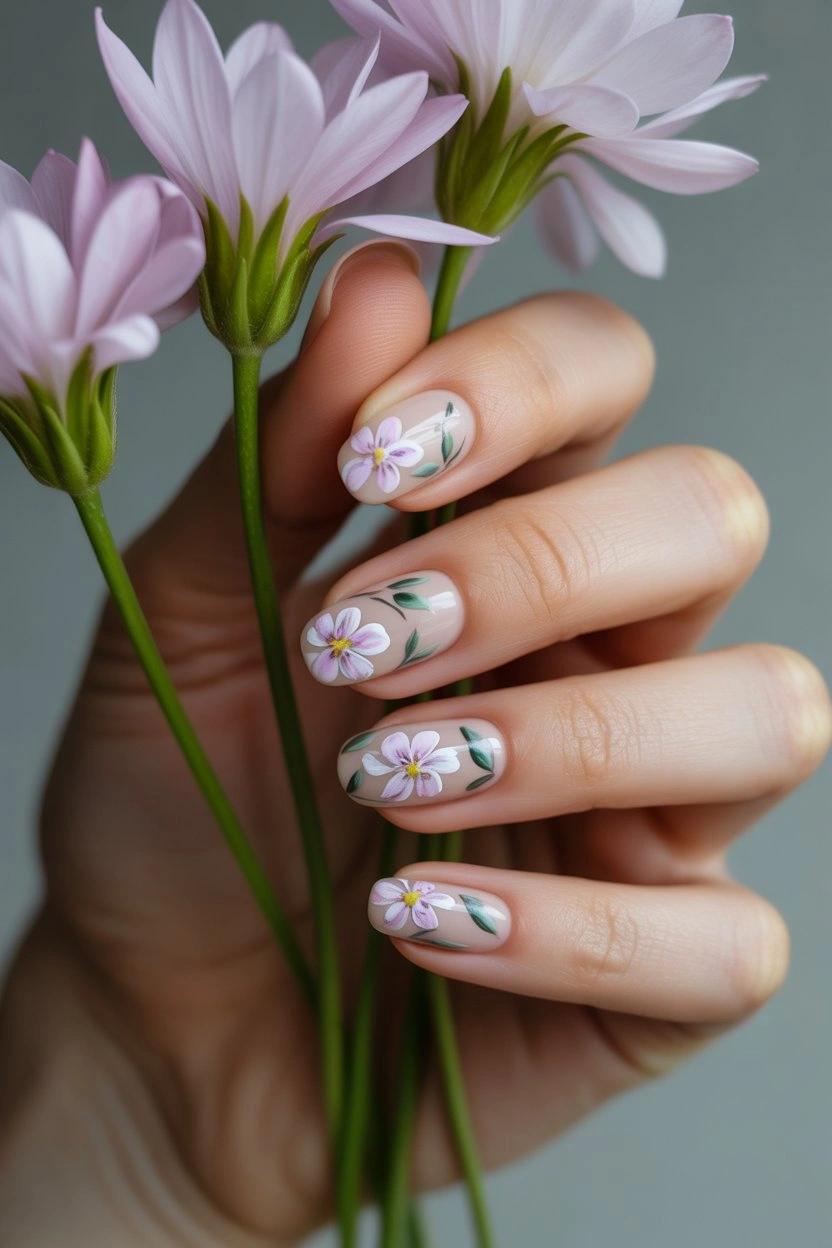
Floral Nail Art for Spring Vibes
Floral nail art is a great way to bring spring into your beauty routine. As the seasons change, our nail designs can show off the vibrant colors and fresh feels of the time. I’m excited to share with you how to create a beautiful floral nail art design that’s perfect for spring.
Materials Needed
To start your floral nail art, you’ll need a few things. You’ll need a base coat, a variety of nail polish colors (pastel shades are great for spring), a nail art brush, and a dotting tool or a toothpick for detailed flower designs. Don’t forget a top coat to seal your design and add shine.
Step-by-Step Tutorial
First, apply a base coat to protect your nails. Then, pick a light pastel color for your background and apply two coats. Once it’s dry, use a nail art brush to paint simple flowers. Start with a central dot and then add petals around it with gentle, sweeping motions.
For more detailed work, use a dotting tool or a toothpick to create the center of the flowers and add details. To add depth to your design, consider layering different colors or adding some green leaves around your flowers. This will make your nail art look more dimensional and vibrant. Finish with a top coat to seal your design.
Seasonal Flower Inspirations
Spring is all about blooming flowers, and your nail art can reflect this. Think about designs that feature daffodils, tulips, or cherry blossoms. These flowers are symbolic of spring and offer a range of colors and shapes for cute nail designs. Experiment with different colors and arrangements to capture the essence of spring vibes on your nails.
With these simple steps and inspirations, you can create a beautiful floral nail art design that’s perfect for the spring season. Enjoy experimenting with different colors and patterns to make your nail design truly unique.
Gradient Ombré Effect
The gradient ombré effect is a cool nail art technique. It makes your nails look amazing by blending colors from dark to light. This creates a cool, multi-dimensional look.
People who love nail art really enjoy the gradient ombré effect. It’s easy to customize and fits any style.
Materials Needed
To get the gradient ombré effect, you need some basic supplies. These include:
- Nail polish in your chosen colors
- A makeup sponge
- A base coat and top coat
- Nail cleanser
Step-by-Step Tutorial
Here’s how to do the gradient ombré effect:
- Prep your nails with a base coat.
- Put a thin layer of the lightest polish color on your whole nail.
- On a makeup sponge, dab small amounts of polish in your colors, from light to dark.
- Gently dab the sponge on your nail for a gradient look.
- Keep dabbing until you get the color you want.
- Finish with a top coat to seal it.
With a bit of practice, you’ll get a smooth, seamless gradient that looks great on everyone.
Color Combinations That Pop
The gradient ombré effect works well with many color combinations. Here are some ideas:
| Color Combination | Effect |
|---|---|
| Pink to White | Soft and feminine |
| Blue to Purple | Bold and vibrant |
| Red to Orange | Warm and energetic |
Try different color combinations to find what you like best.
Glitter Accent Nails
Adding glamour to your nails is easy with glitter accent nails. A simple manicure can turn into stunning nail art with sparkly accents. They’re great for adding personality to your look.
Materials Needed
To do glitter accent nails, you need a few things: base coat, nail polish, glitter polish or loose glitter, top coat, and a nail art brush. I like using glitter polish for its ease. But loose glitter lets you customize more.
Step-by-Step Tutorial
Here’s how to get beautiful glitter accent nails at home:
- Apply a base coat to protect your nails.
- Paint your nails with your chosen color.
- Use a nail art brush to apply glitter polish or loose glitter to the accent nail.
- Seal the glitter with a top coat.
Using a small nail art brush helps you place glitter exactly. Try different glitter colors and nail polish shades for amazing looks.
Glitter Placement Ideas
Glitter accent nails are versatile. You can put glitter on one nail, many nails, or make a gradient. Here are some ideas:
| Glitter Placement | Description | Style Tip |
|---|---|---|
| Single Accent Nail | Apply glitter to one nail for a subtle sparkle. | Pairs well with bold nail colors. |
| Gradient Effect | Apply glitter from one nail to the next. | Creates a cohesive, eye-catching look. |
| Multiple Accent Nails | Apply glitter to many nails for a dramatic effect. | Perfect for special occasions. |
Try different glitter placements to find your perfect style.
Negative Space Nail Art
I’ve fallen in love with negative space nail art. It’s a style that uses the natural nail in the design. This method leaves parts of the nail unpainted, creating a striking contrast.
Materials Needed
To start with negative space nail art, you’ll need a few things:
- Nail polish in your chosen colors
- Nail tape or stickers for clean lines
- A top coat to seal your design
- A base coat to protect your nails
Step-by-Step Tutorial
Here’s a simple guide to making your own negative space nail art:
- Prep your nails with a base coat to protect them and help polish stick.
- Apply polish to the whole nail or just the areas you want to color.
- Use nail tape or stickers to block off parts of the nail for the negative space.
- Apply another color or leave the masked areas bare for contrast.
- Finish with a top coat to seal your design and add shine.
Modern Design Variations
Negative space nail art is very flexible, allowing for many modern designs. You can play with shapes, colors, and patterns. For a geometric look, use tape for sharp lines and angles. For something more subtle, try a sheer polish or a minimalist design.
By using negative space in your nail art, you get a modern and sophisticated look. It’s great for any event, whether it’s work or a night out. This technique is sure to catch eyes.
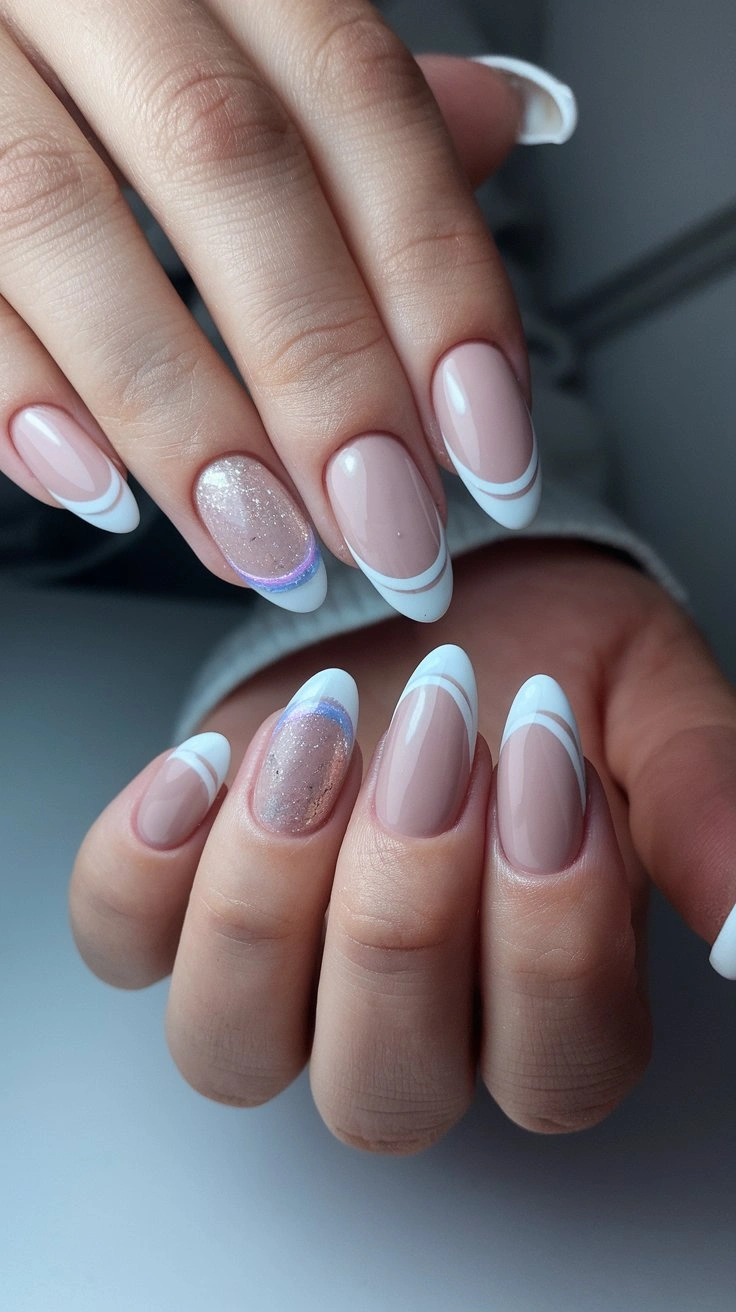
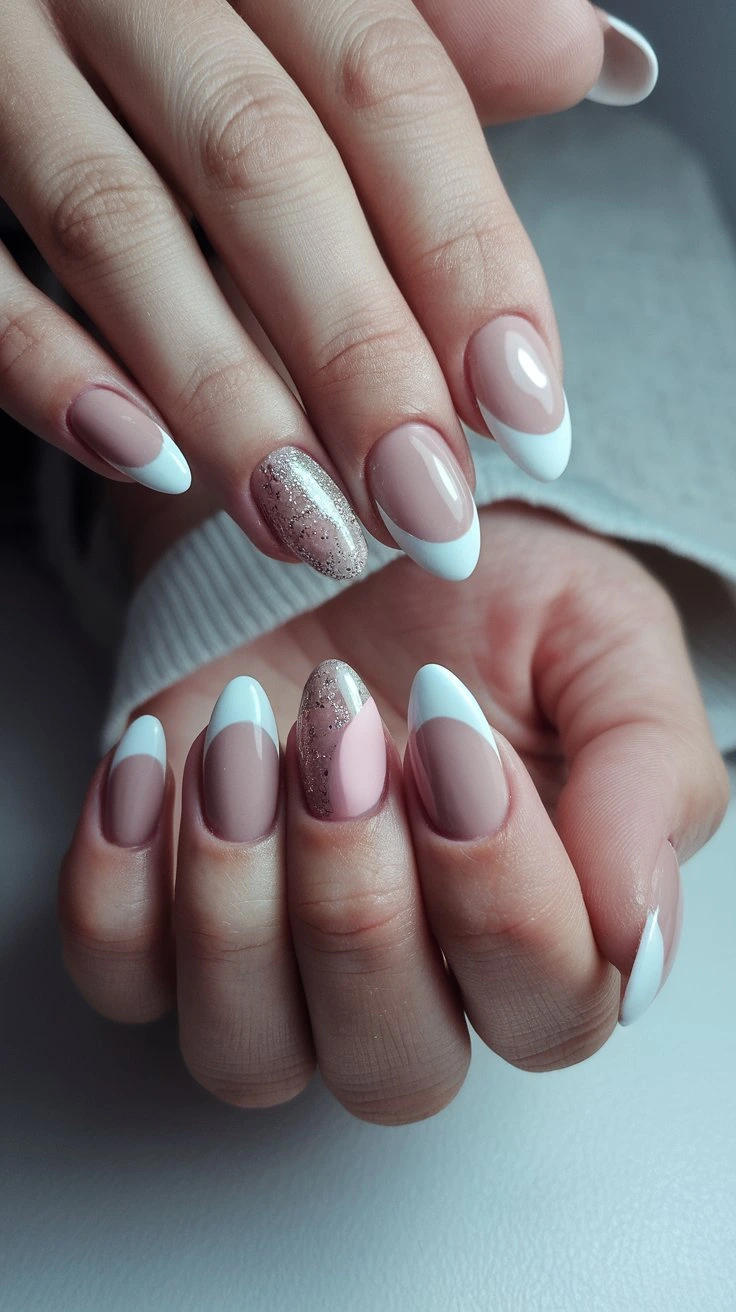
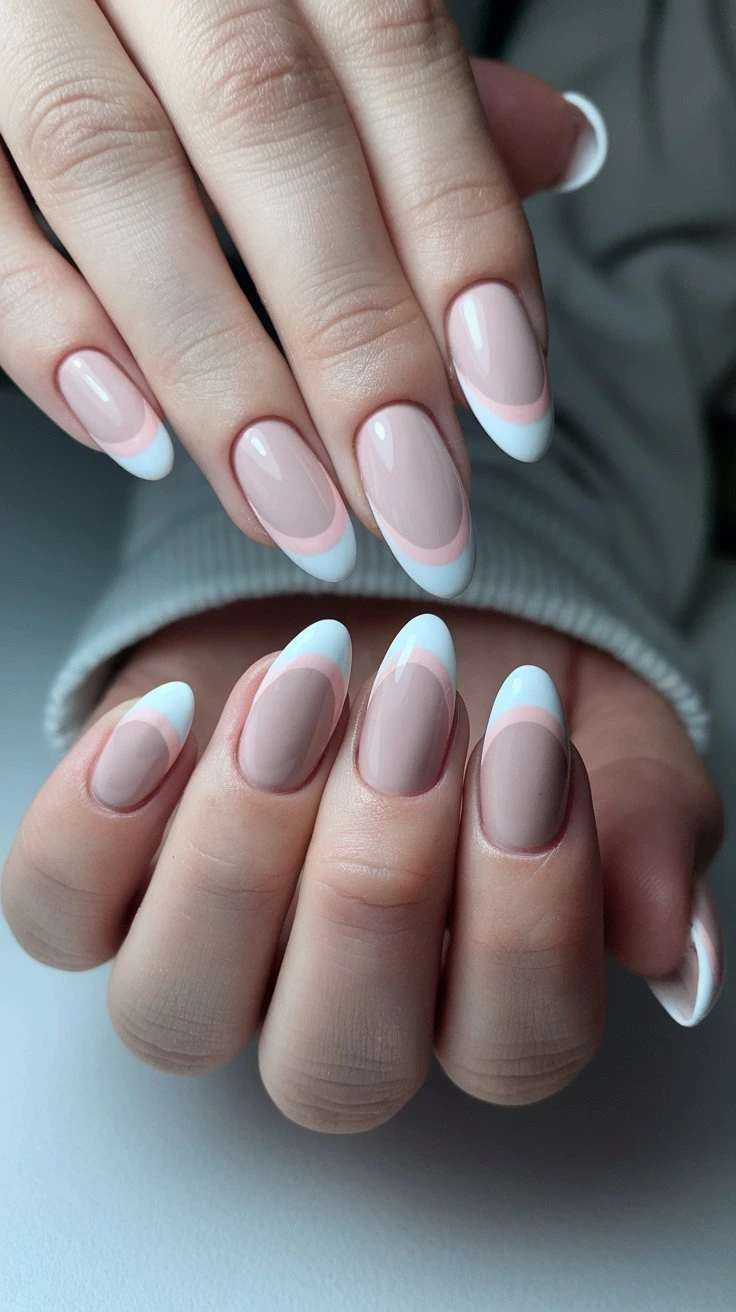
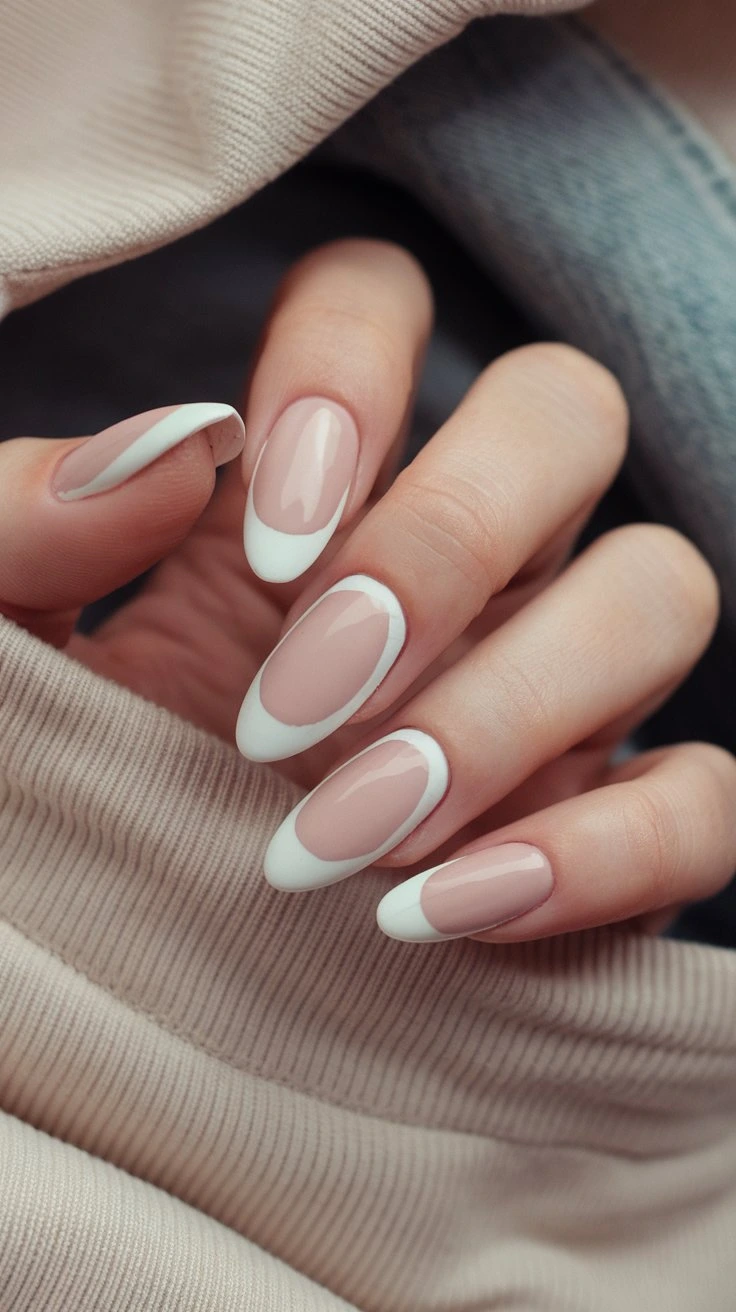
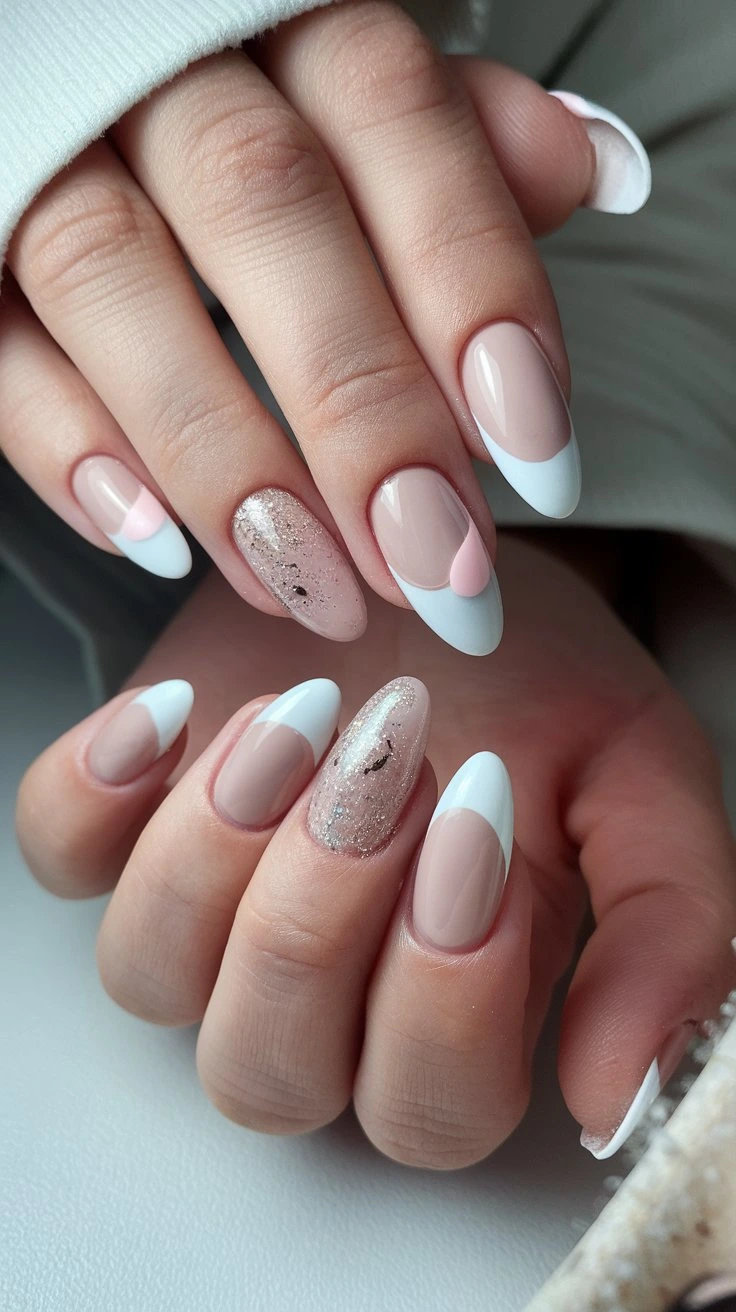
French Manicure with a Twist
I’m excited to share how to put a fresh spin on the traditional French manicure. This classic nail design has been a staple for years. With a few simple tweaks, you can make it truly unique.
Materials Needed
To create a French manicure with a twist, you’ll need a few basic nail supplies. These include:
- A base coat to protect your nails
- A white tip polish for the classic French look
- A colored polish of your choice to add a twist
- A top coat to seal your design
- Nail guides or stickers for a precise application
Step-by-Step Tutorial
Here’s how to achieve a French manicure with a cute nail twist:
- Prep your nails by cleaning and shaping them.
- Apply a base coat to protect your nails.
- Use nail guides or stickers to create a precise tip.
- Paint the tip with white polish for a classic French manicure base.
- Add your twist by painting a colored stripe or design alongside the white tip.
- Finish with a top coat to seal your nail design.
For a more detailed design, use nail art brushes or dotting tools. Add patterns or details to your French manicure.
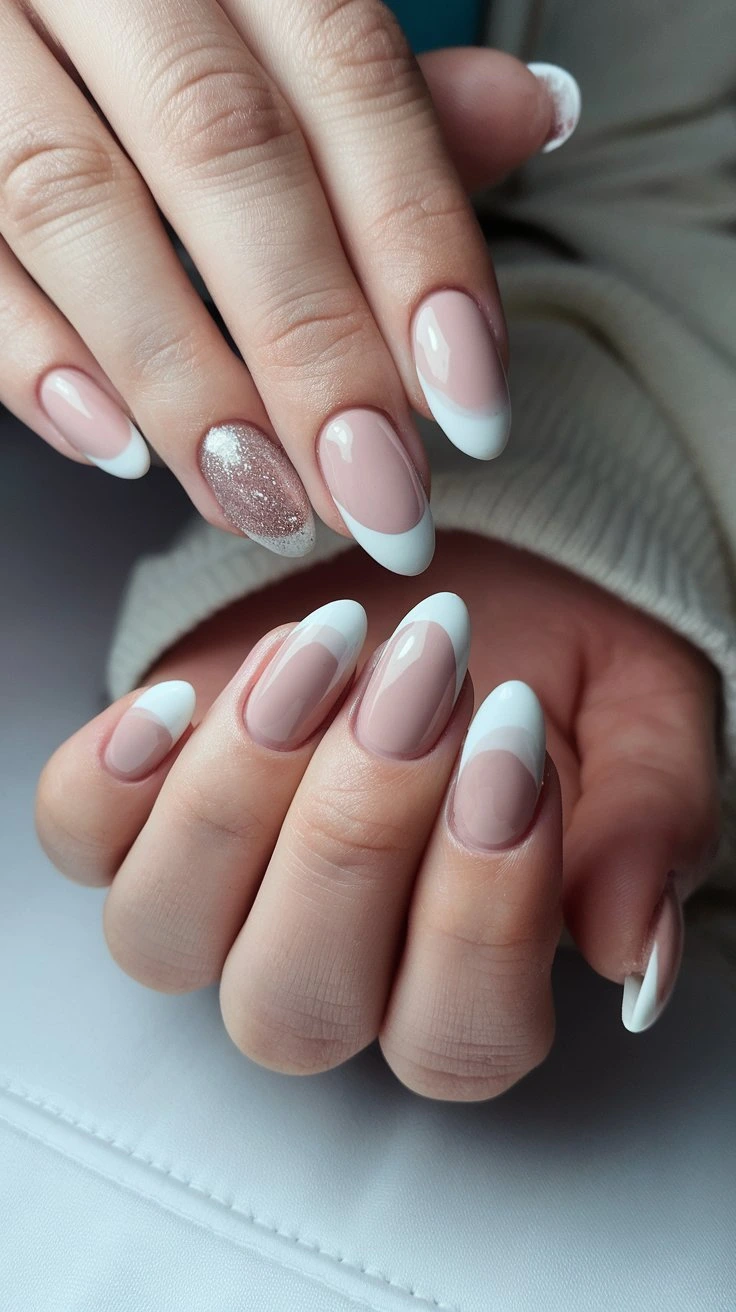
Creative Tip Designs
Experiment with different twists to make your French manicure stand out. Here are a few ideas:
| Design | Description | Best For |
|---|---|---|
| Colored Tip | Replace the white tip with a colored polish for a modern look. | Those who want a bold change. |
| Glitter Accent | Add glitter on top of the white tip for extra sparkle. | Individuals looking for a glamorous touch. |
| Nail Art | Use nail art brushes to create patterns or designs alongside the French tip. | Creative individuals who enjoy detailed designs. |
By incorporating one of these twists, you can easily elevate your French manicure. Make it a cute nail design that reflects your personality.
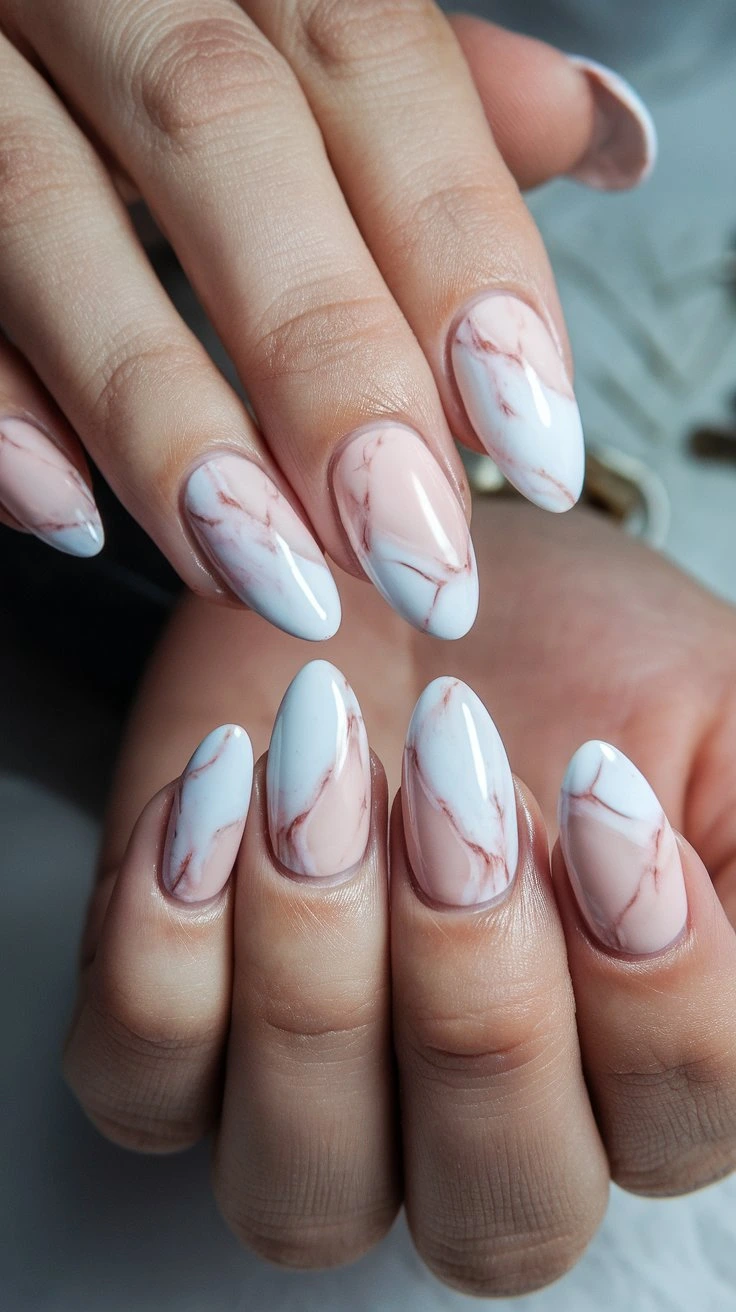
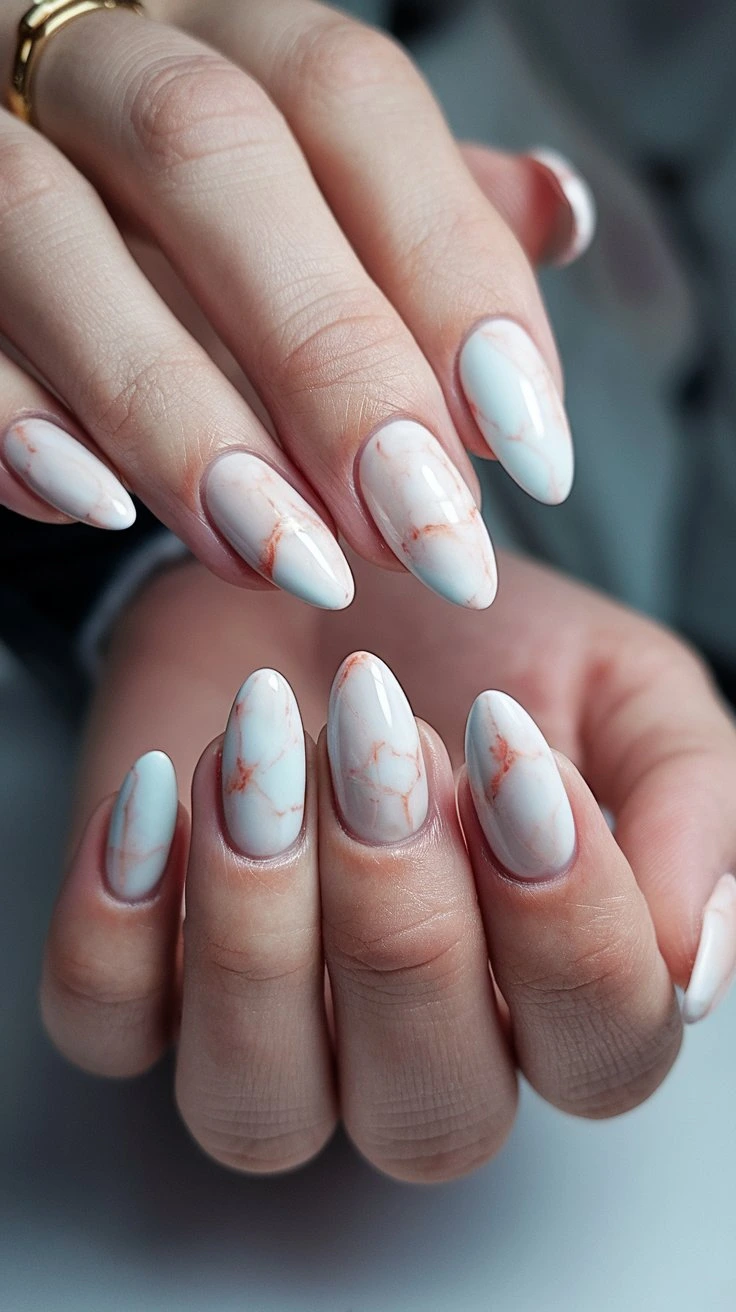
Marble Effect Nails
If you want a nail design that’s both stylish and timeless, try the marble effect. I love the elegance of marble, and it looks amazing on nails. It adds sophistication to your look.
Materials Needed
To get the marble effect, you’ll need some basic supplies. Here’s what you’ll need:
- Nail polish in your chosen colors
- A makeup sponge
- A base coat and top coat
- Nail cleanser
- A nail art brush (optional)
Step-by-Step Tutorial
Creating marble effect nails is a bit of a process, but it’s easy. Here’s how to do it:
- Prep your nails with a base coat and let it dry completely.
- Apply a white or light-colored polish as the base color and let it dry.
- Drop small amounts of different colored polish onto a makeup sponge.
- Dab the sponge onto your nail to create a marbled effect.
- Repeat the dabbing process until you achieve the desired color intensity.
- Finish with a top coat to seal in the design.
Color Schemes That Work Best
The beauty of marble effect nails is their versatility. You can try different color combinations to find what suits you best. Here are a few suggestions:
| Color Scheme | Description | Best For |
|---|---|---|
| Pastel Pink and White | Soft, romantic look | Spring and summer |
| Blue and Gray | Cool, sophisticated look | Any season |
| Purple and Silver | Luxurious, glamorous look | Evening events |
Try different colors and techniques to find the perfect marble effect nail design for you.
Nail Care After Your DIY Manicure
Proper nail care is key to keeping your DIY manicure looking great. After you’ve spent time on a beautiful nail design, it’s important to take care of your nails. This will help your nail art last longer.
Extending the Life of Your Nail Art
To keep your nail art looking fresh, don’t use your nails as tools. Wear gloves when doing chores, like cleaning with harsh chemicals. This protects your nails from damage.
Also, applying a top coat regularly can prevent chipping and fading. Being gentle with your hands and avoiding too much water exposure helps too. If you see chips or cracks, fix them right away to prevent more damage.
Nourishing Products for Healthy Nails
Using nourishing products is vital for healthy nails. Cuticle oils and creams keep your nails and cuticles moisturized. Look for products with argan oil, vitamin E, or keratin for their nourishing benefits.
Massaging your nails and cuticles with nourishing oil improves blood flow. It also promotes healthy nail growth.
When to Remove and Refresh Your Design
Knowing when to remove and refresh your nail design is important. If your polish starts to lift or your nails get discolored, it’s time for a change. Use a gentle remover to avoid damaging your nails.
Give your nails a few days to breathe before applying a new design. This helps keep them healthy and strong.
Conclusion
Nail art is more than just looks; it’s a way to care for yourself. The 10 cute nail designs we’ve talked about are a fun way to pamper yourself. They offer a creative outlet for the weekend.
Trying out different nail designs lets you show off your personality. You can choose from pastel watercolor, minimalist geometric patterns, or glitter accent nails. There’s something for everyone.
Seeing nail art as a self-care activity is very rewarding. It lets you take a break, be creative, and focus on yourself. As you try new designs, you’ll feel more confident and unique.
So, let’s get creative and have fun with our nails. With these cute designs, you can make nail art a big part of your self-care routine.
FAQ
What are the essential tools needed for cute nail designs?
To make cute nail designs, you’ll need basic tools. These include nail files, cuticle tools, quality brushes, and polishes. You might also want dotting tools and nail art brushes for more details.
How do I prepare my nails for a DIY manicure?
To get ready for a DIY manicure, start by cleaning and shaping your nails. Then, apply a base coat. This helps protect your nails and makes the polish stick better.
What is the best way to achieve a pastel watercolor cute nail design?
For a pastel watercolor look, use a wet-on-wet technique. Apply pastel polishes one after another without letting them dry. Blend the colors on your nail for a soft effect. You can also use a sponge for a gradient look.
How can I make my nail art last longer?
To make your nail art last, apply a top coat. Try not to use your nails as tools. Also, keep your nails moisturized with cuticle oil.
What are some creative ways to use glitter in cute nail designs?
Glitter is great for nail art. You can use it as an accent nail or create a glitter gradient. Adding glitter dots is another fun idea. Try different glitter colors and textures to add depth to your designs.
How do I care for my nails after a DIY manicure?
After a DIY manicure, keep your nails moisturized. Avoid harsh chemicals and be gentle when doing dishes or other activities that can dry out your nails.
Can I use regular nail polish for nail art?
Yes, you can use regular nail polish for nail art. But, consider using polishes made for nail art. They usually have a thicker consistency and brighter colors.
What are some popular cute nail design trends?
Popular trends include minimalist geometric designs and polka dots. Floral nail art and gradient ombré effects are also in style. You can also try negative space nail art and French manicures with a twist.