
Easy Macrame Cord Crochet Bag That Looks Boutique-Made
If you’ve been searching for crochet bags free patterns, I’m so excited to share this little macrame-cord bag with you! It has that structured, boutique-style look I love, but the actual crochet is wonderfully beginner-friendly. We’ll build an oval base, crochet the body upward in simple stitches, and form two integrated handles without any complicated sewing, according to The Spruce Crafts. I made mine entirely in olive green for a clean, modern finish. If this is your first bag, grab your supplies and let’s dive in—you’ll be surprised how quickly it starts looking like a real handbag.
The Little Macrame Bag I Keep Reaching For
This sturdy small handbag is worth making because the macrame cord gives even basic single crochet enough structure to create a polished, functional accessory.
Materials Needed
For this version of my crochet bags free patterns project, I recommend keeping the materials simple and consistent:
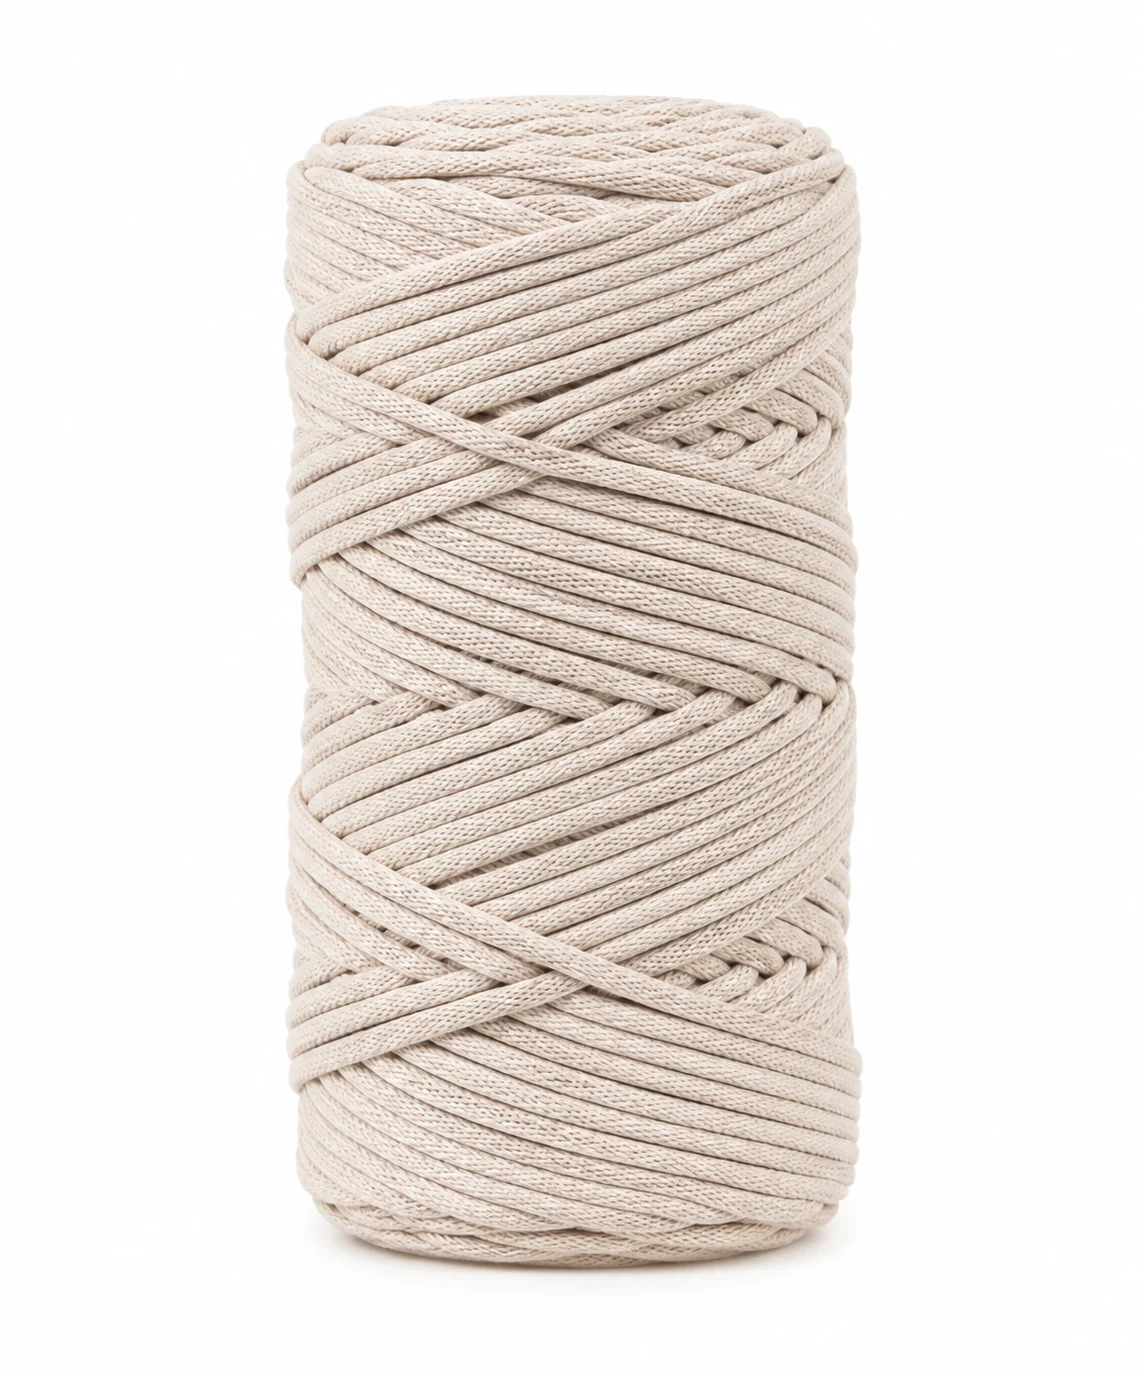
3 mm braided macrame cotton cord, approximately 220 yards / 200 meters, in olive green
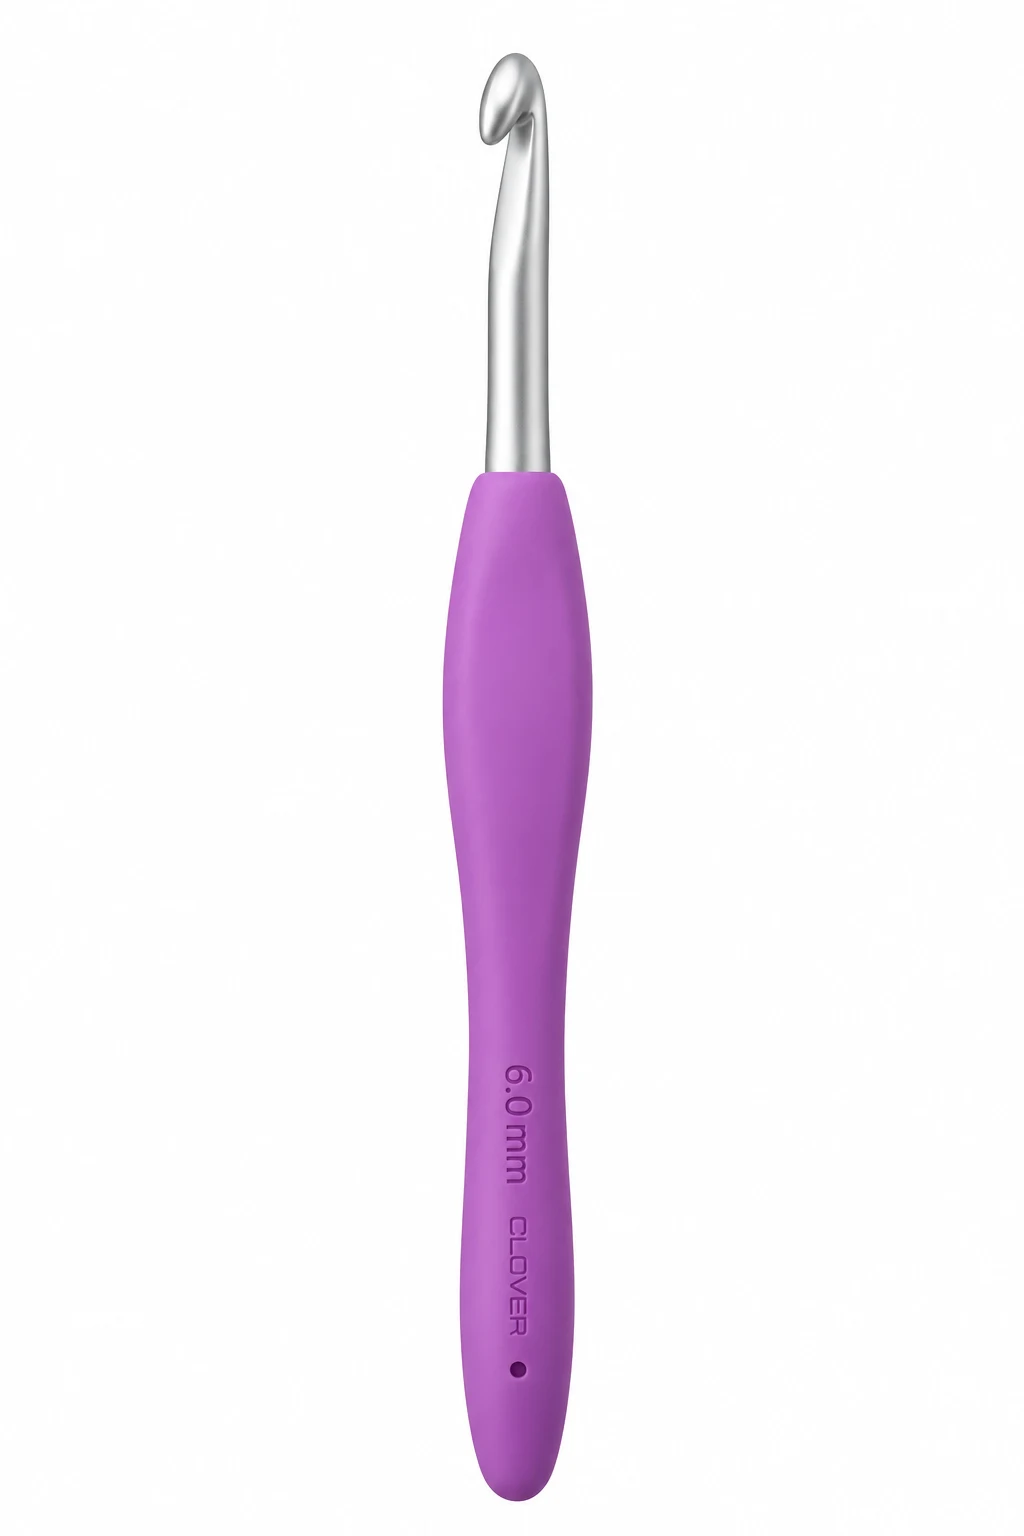
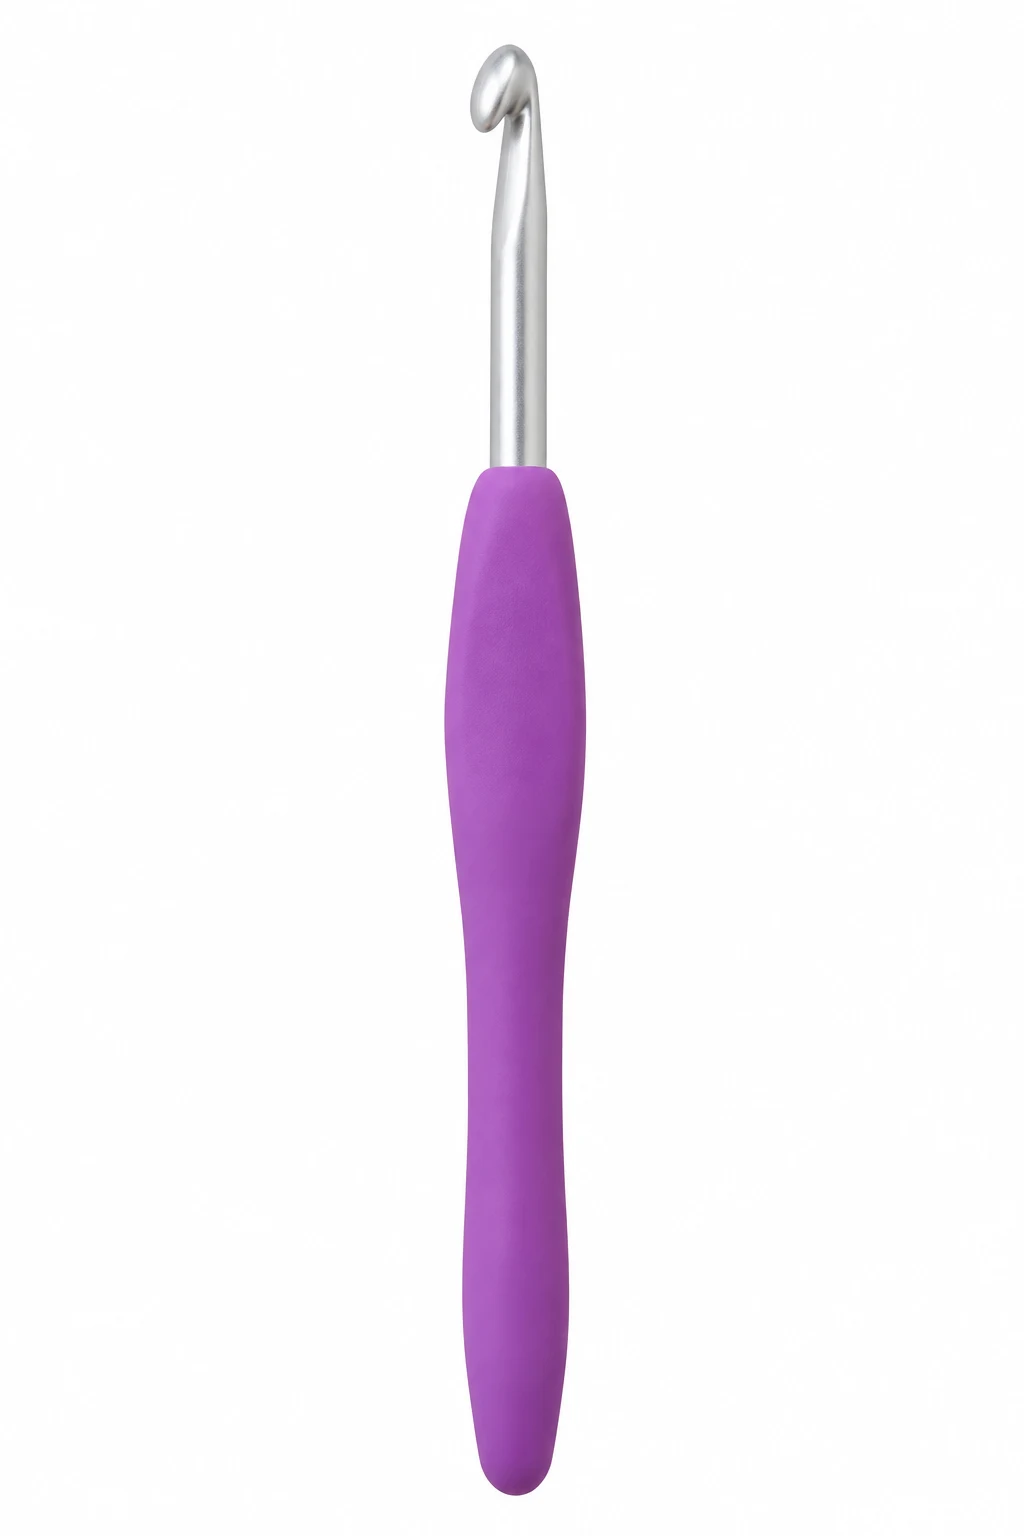
6 mm crochet hook; use a smooth aluminum or ergonomic hook that moves easily through dense cord
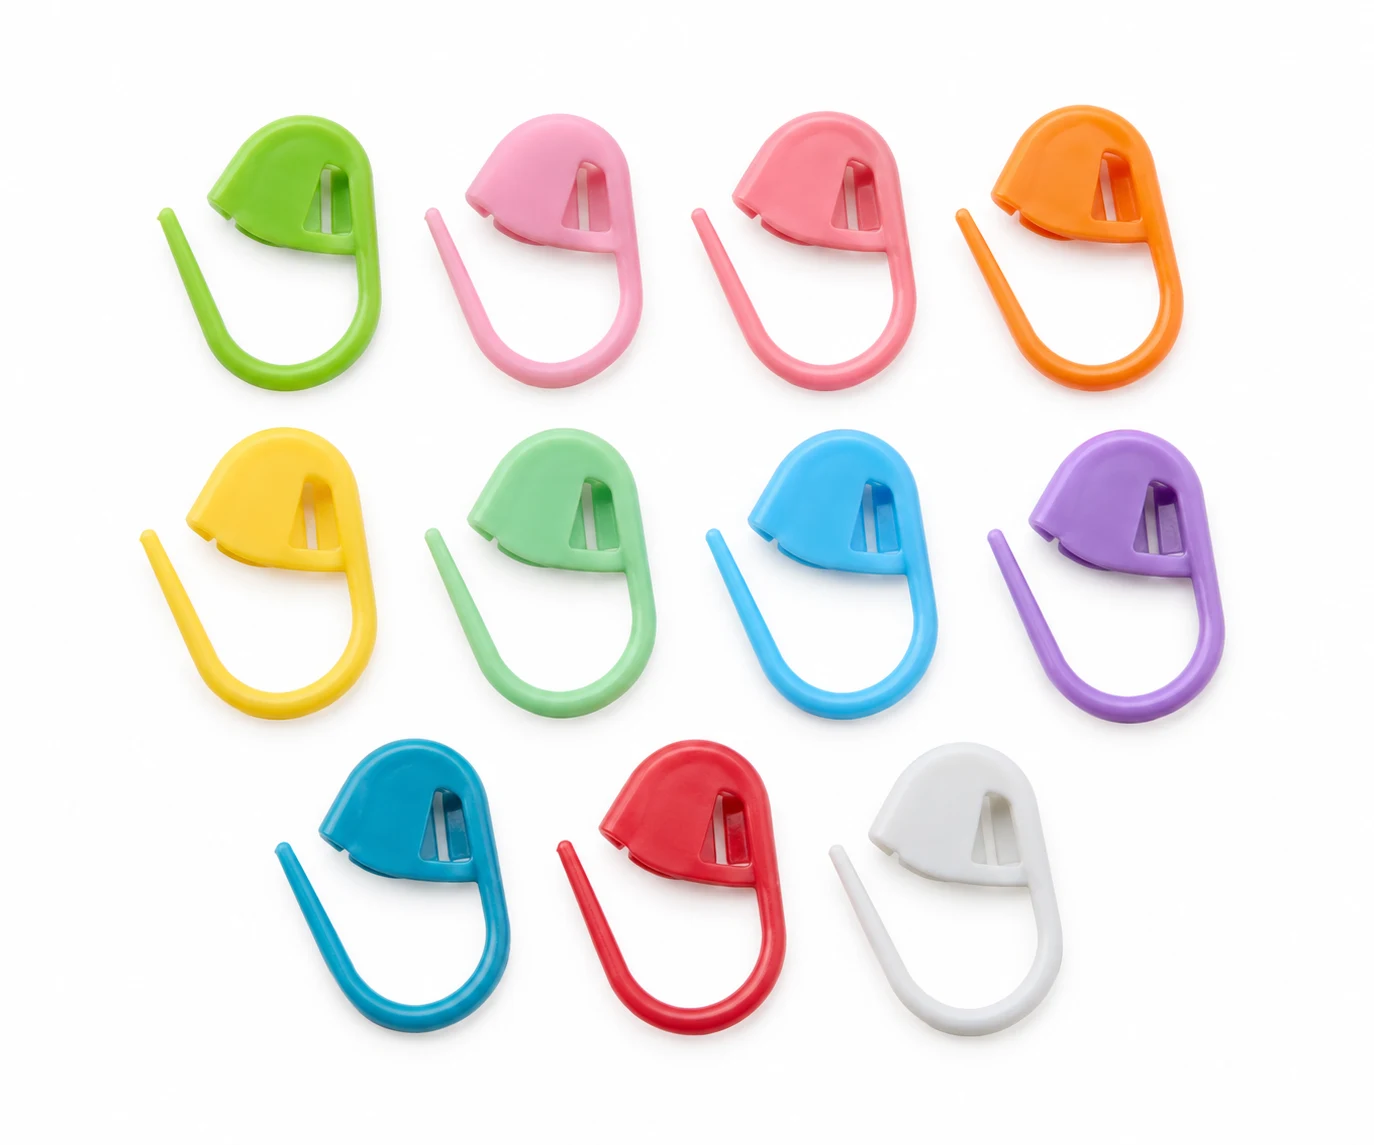
2 locking stitch markers
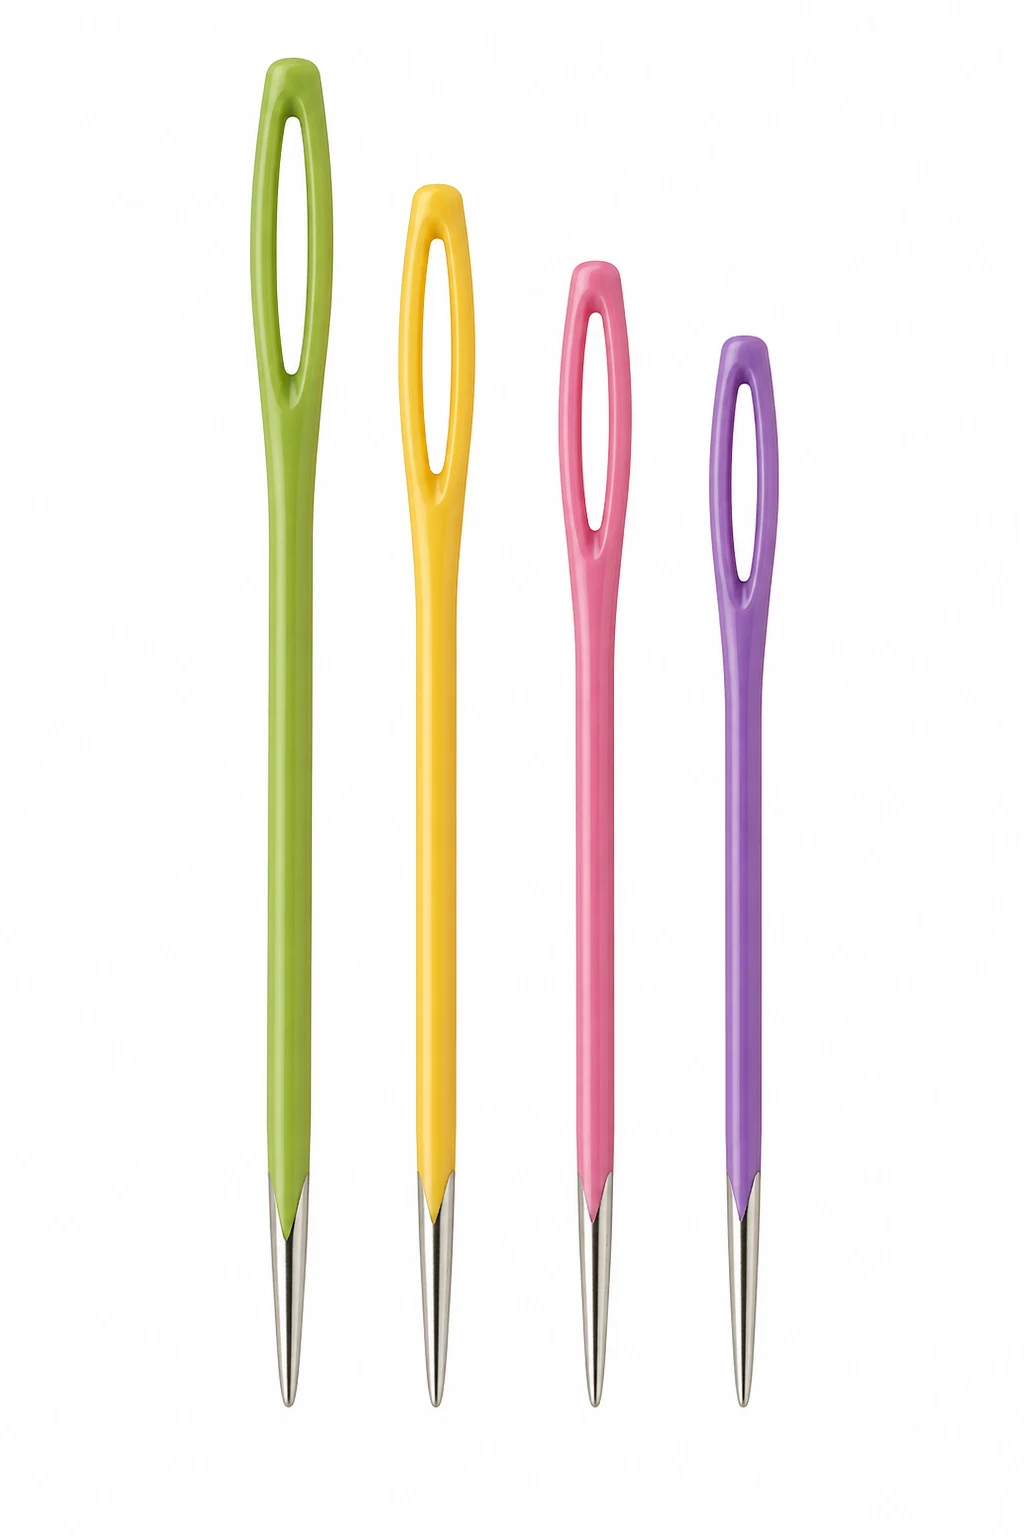
Tapestry needle with an eye large enough for 3 mm cord
Sharp scissors
Flexible measuring tape
Gauge (Approximate): 8 sc × 9 rounds = 4 × 4 inches / 10 × 10 cm worked firmly in continuous rounds with a 6 mm hook. Because macrame cord varies, matching the finished measurements is more important than matching gauge perfectly.
Quantity: 1 bag, using approximately 180–200 meters of 3 mm macrame cord; one 200-meter spool is the minimum recommended quantity.
Color: olive green throughout the entire bag, including the base, body, handles, and finishing.
The dense cord is what separates this project from softer yarn-based crochet handbag free patterns. It gives the bag enough body to stand neatly without adding a fabric lining, according to Martha Stewart Crafts.
Abbreviations / Terms Used
ch — chain
sc — single crochet
sl st — slip stitch
st / sts — stitch / stitches
rnd — round
RS — right side
YO — yarn over
BLO — back loop only
PM — place marker
sk — skip
rep — repeat
Continuous round — crochet in a spiral without joining each round
Back bump — the horizontal bump visible on the back of a foundation chain
What You Should Keep in Mind
Keep your tension firm but comfortable. Macrame cord makes a beautifully structured bag, but pulling every stitch extremely tight can make it difficult to insert your hook on the following round.
Count the base carefully. The entire body depends on maintaining 36 stitches, so an accidental extra stitch at either curved end can change the shape of the bag.
Use your stitch marker every round. Because these crochet bags free patterns instructions use continuous rounds, there is no visible seam to tell you automatically where a round begins.
Keep the handles symmetrical. Count the skipped stitches rather than judging their placement visually. Even one misplaced stitch can make one handle sit farther from the side than the other.
Free Pattern: crochet bags free patterns
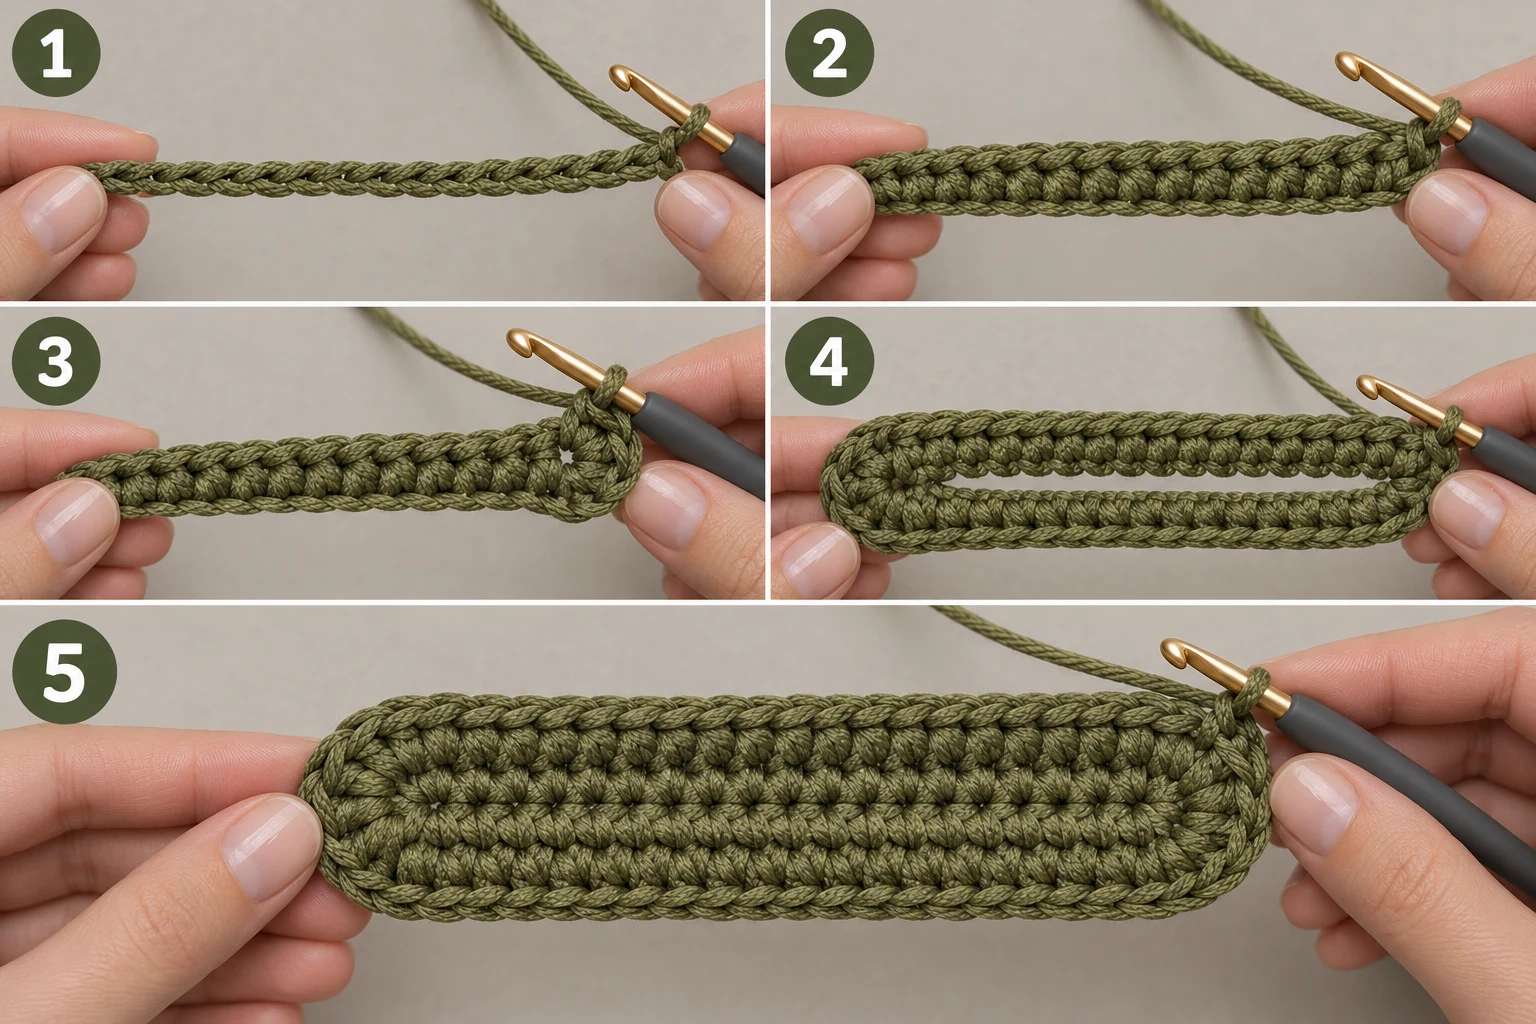
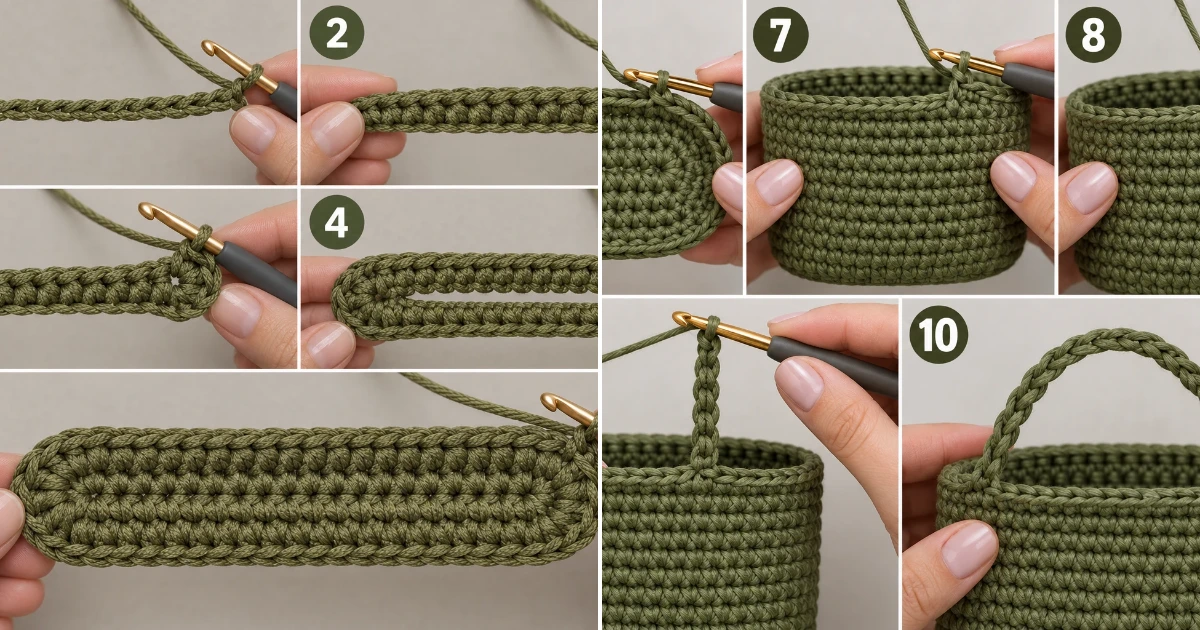
1. Make the Foundation Chain — crochet
Action: Chain 17 stitches with the olive green macrame cord.
Detailed instructions: Make a slip knot and place it on the 6 mm hook. Hold the working olive green cord behind the hook, YO from back to front, and pull through the active loop once for each chain until 17 ch have been formed. Keep the chains even and loose enough that the hook can enter their back bumps.
Expected result: You should have one straight foundation chain containing 17 visible chain stitches, with the active loop remaining on the hook.
Check yourself: Count from the first complete chain below the hook to the starting chain; there should be exactly 17 chains.
2. Crochet Across the First Side
Action: Work 16 sc across the back bumps of the foundation chain.
Detailed instructions: Turn the chain so its back bumps face you. Insert the hook under the back bump of the second chain from the hook, YO, and pull up one loop so two loops sit on the hook. YO again and pull through both loops to complete one sc. Repeat into each remaining back bump until you reach the final chain, producing 16 sc total.
Expected result: One side of the foundation chain is covered with a straight row of 16 compact single crochet stitches.
Check yourself: Count the tops of the stitches; you should have 16 sc before shaping the end.
3. Turn the First End — crochet
Action: Work 3 sc into the end chain to form the first curve of the oval base.
Detailed instructions: Rotate the narrow strip clockwise without turning it over. Insert the hook into the end chain space, YO and pull up a loop, then YO and pull through both loops. Repeat twice more into that same end space so 3 sc sit together around the end of the foundation.
Expected result: The straight strip begins curving smoothly around one end instead of folding sharply.
Check yourself: You should see 3 sc sharing the same end chain space.
4. Crochet Along the Second Side
Action: Work 15 sc along the unworked side of the foundation chain.
Detailed instructions: Continue around rather than turning the work. Insert the hook beneath the exposed loop of the next foundation chain, YO and pull up one loop, then YO and pull through both loops. Work 1 sc into each of the next 15 chain positions, stopping before the starting end.
Expected result: Both long sides of the foundation are now covered in compact olive green single crochet, with one end already rounded.
Check yourself: There should be 15 new sc along this second side and one remaining end space waiting to be shaped.
5. Complete the Oval Base Round
Action: Work 2 sc into the starting end space to finish the 36-stitch oval.
Detailed instructions: Insert the hook into the same starting chain space that already holds the first sc of the round. YO and pull up a loop, YO and pull through both loops; repeat once more in the same space. The original first sc plus these 2 additional sc create a three-stitch curve matching the opposite end. Place a marker in the first stitch of the next round.
Expected result: You now have a compact symmetrical oval containing 36 sc around its perimeter.
Check yourself: Count the complete perimeter carefully; it must contain exactly 36 stitches.
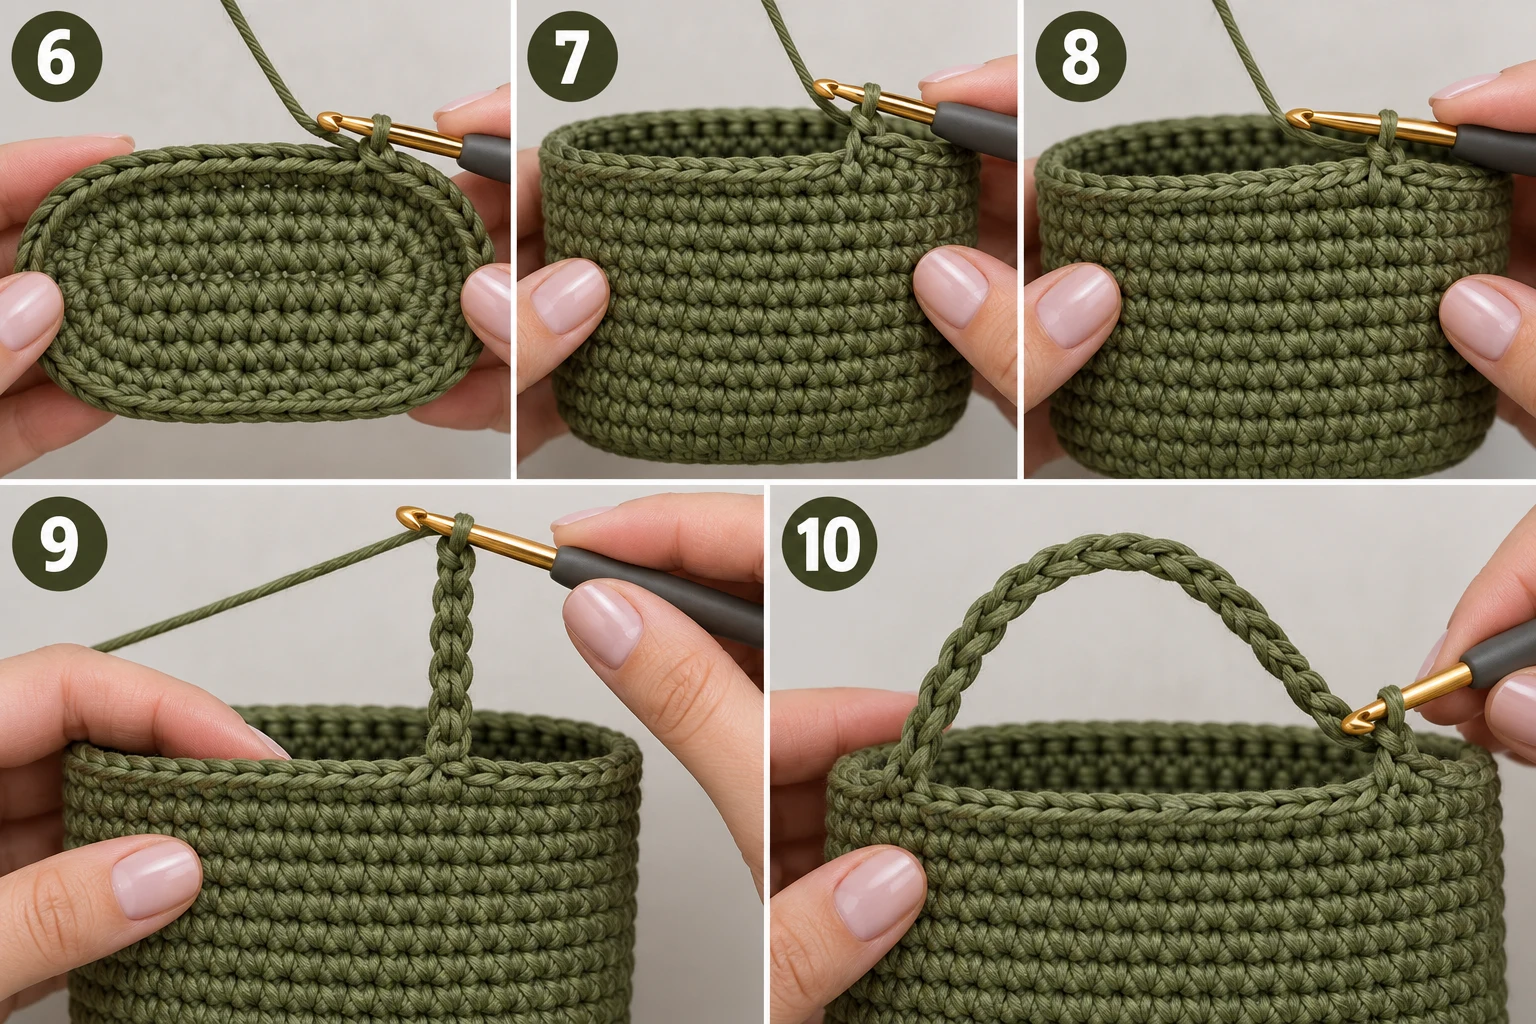
6. Create the Base Edge
Action: Work Round 2 as 36 sc in BLO.
Detailed instructions: Insert the hook under only the back loop of the first marked stitch, YO and pull up one loop, then YO and pull through both loops. Move the marker into this new stitch. Continue working 1 sc BLO in every stitch around, finishing with 36 sc and no increase.
Expected result: A distinct ridge appears around the edge of the oval, encouraging the bag wall to turn upward.
Check yourself: Your round should still contain 36 stitches, with a visible unused front-loop ridge around the base.
7. Build Rounds 3 Through 14
Action: Work 12 straight rounds of 36 sc each.
Detailed instructions: Insert the hook beneath both top loops of the first marked stitch, YO, pull up a loop, YO again, and pull through both loops. Move the marker upward and continue with 1 sc in each stitch around. Repeat this exact 36-sc round through Round 14, never joining or turning and maintaining 36 sts per round.
Expected result: The olive green crochet rises into a firm, seamless pouch with straight sides and an oval bottom.
Check yourself: Round 14 should still contain 36 sts, and the body should measure approximately 5.5–6 inches / 14–15 cm above the base ridge.
8. Crochet to the First Handle Position
Action: Work 5 sc at the beginning of Round 15.
Detailed instructions: With the stitch marker identifying the start of Round 15, work 1 sc beneath both loops of each of the next 5 stitches. Complete every sc by pulling up one loop, then yarning over and pulling through both loops. Stop immediately after the fifth stitch.
Expected result: Five new stitches extend Round 15 along the first side while the remainder of the round stays unworked.
Check yourself: Count exactly 5 completed sc from the marker before beginning the first handle opening.
9. Chain the First Handle
Action: Chain 12 to form the first handle span.
Detailed instructions: Without inserting the hook into the bag, YO with the olive green cord and pull through the active loop 12 times, keeping each chain firm but not tight. Hold the base of the chain with your non-hook hand so the links stay uniform.
Expected result: A flexible 12-chain strap extends upward from the fifth stitch of Round 15.
Check yourself: Count the V-shaped links between the bag rim and hook; there should be exactly 12 chains.
10. Anchor the First Handle
Action: Skip 8 rim stitches and work 1 sc into the ninth stitch.
Detailed instructions: Count 8 unworked stitches along Round 14 without twisting the 12-chain span. Insert the hook beneath both loops of the next stitch—the ninth stitch from the last worked sc—YO and pull up one loop, then YO and pull through both loops to anchor the handle.
Expected result: The first 12-chain handle arches neatly over an opening of 8 skipped stitches.
Check yourself: Exactly 8 unworked rim stitches should be visible beneath the first handle arch.
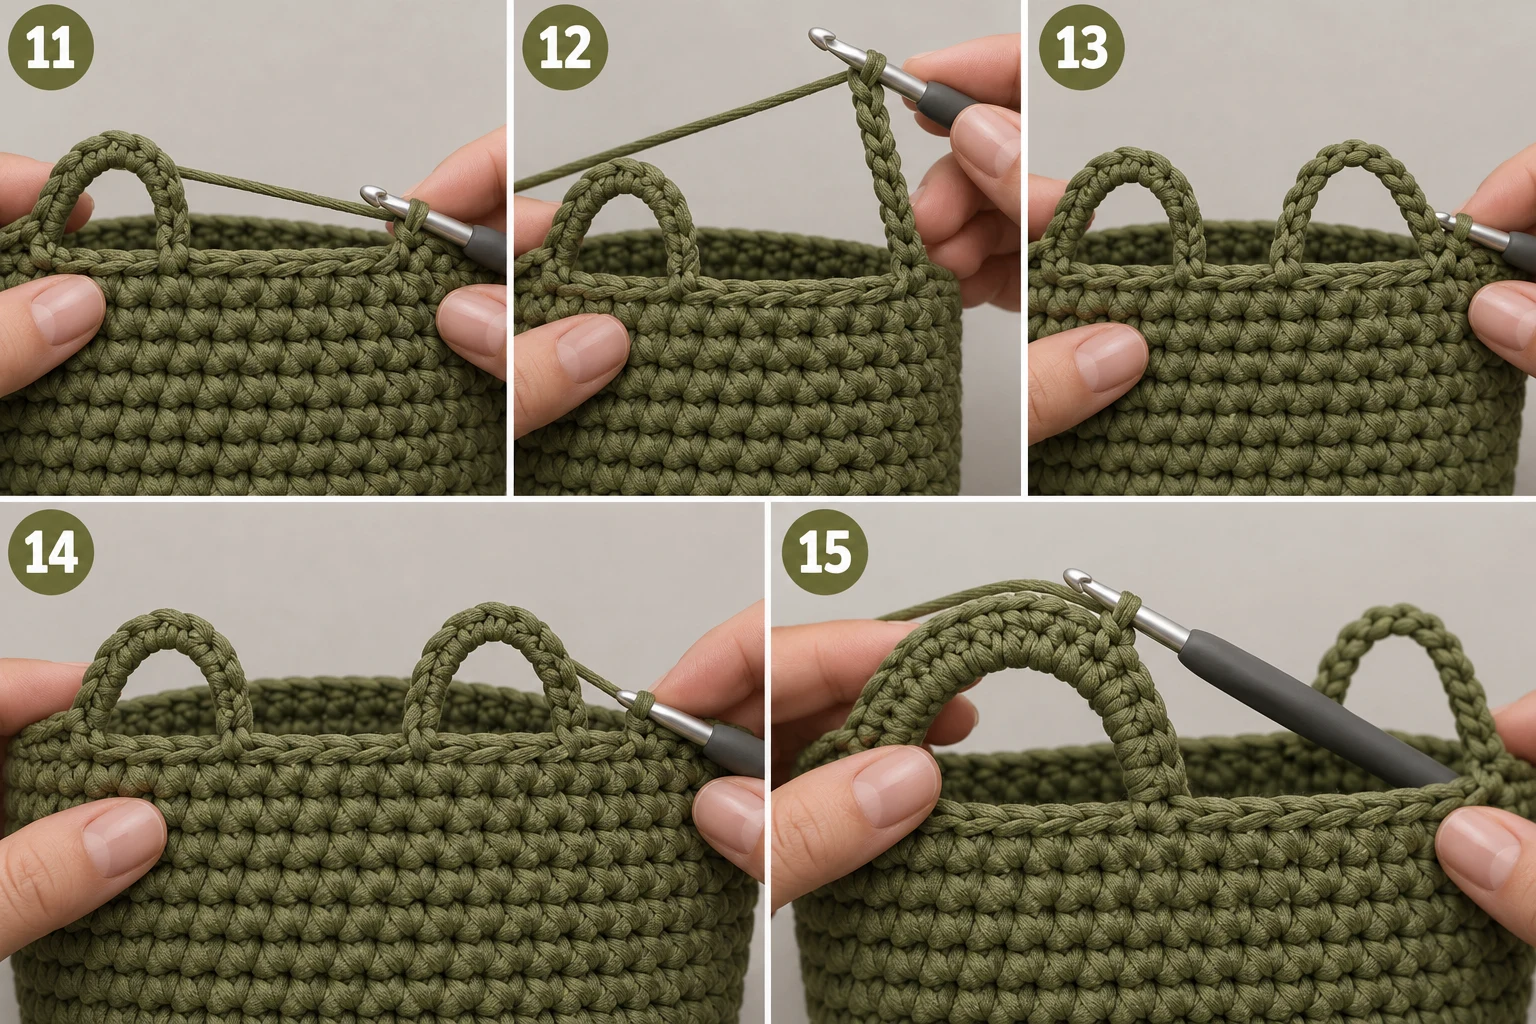
11. Crochet Between the Handles
Action: Work 9 sc across the next 9 rim stitches.
Detailed instructions: Starting in the stitch immediately after the first handle anchor, work 1 sc in each of the next 9 stitches, inserting under both top loops each time. Stop after the ninth sc so the second handle will sit directly opposite the first.
Expected result: A solid section of 9 sc separates the two future handle openings.
Check yourself: Count nine uninterrupted stitches from the first handle anchor to your hook.
12. Chain the Second Handle
Action: Chain 12 for the second handle.
Detailed instructions: Keep the olive green cord behind the hook, YO and pull through the active loop 12 times. Match the tension and chain size of the first handle so both arches will have the same finished height.
Expected result: A second 12-chain strand extends from the opposite side of the bag.
Check yourself: Compare the two chain lengths visually and count the new strand to confirm exactly 12 ch.
13. Anchor the Second Handle
Action: Skip 8 stitches and work 1 sc into the following stitch.
Detailed instructions: Count exactly 8 unworked rim stitches, keeping the new chain flat and untwisted. Insert the hook under both top loops of the next rim stitch, YO, pull up a loop, YO again, and pull through both loops to complete the anchoring sc.
Expected result: Two matching 12-chain handles now sit opposite one another, each spanning an 8-stitch opening.
Check yourself: Both handle openings should contain exactly 8 skipped stitches.
14. Complete the Handle Round
Action: Work 5 sc to finish Round 15.
Detailed instructions: Work 1 sc into each of the final 5 unworked rim stitches, inserting beneath both top loops. The round now consists of 20 body sc + 24 handle chains, while 16 previous-round stitches remain skipped beneath the two handles.
Expected result: Round 15 is complete with two evenly spaced integrated handle arches.
Check yourself: You should have 5 sc, 12 ch, skip 8, 10 sc including the first anchor, 12 ch, skip 8, 5 sc, with the handles centered opposite each other.
15. Reinforce the First Handle
Action: Single crochet across the first 12-chain handle in Round 16.
Detailed instructions: Work sc across the solid rim until you reach the first handle chain, then insert the hook under both loops of the first chain, YO and pull up a loop, YO and pull through both loops. Continue with 1 sc into each of the 12 handle chains, producing 12 sc across the first handle.
Expected result: The first thin chain arch becomes a thicker, sturdier crocheted handle.
Check yourself: Count 12 sc sitting directly across the 12 chains of the first handle.
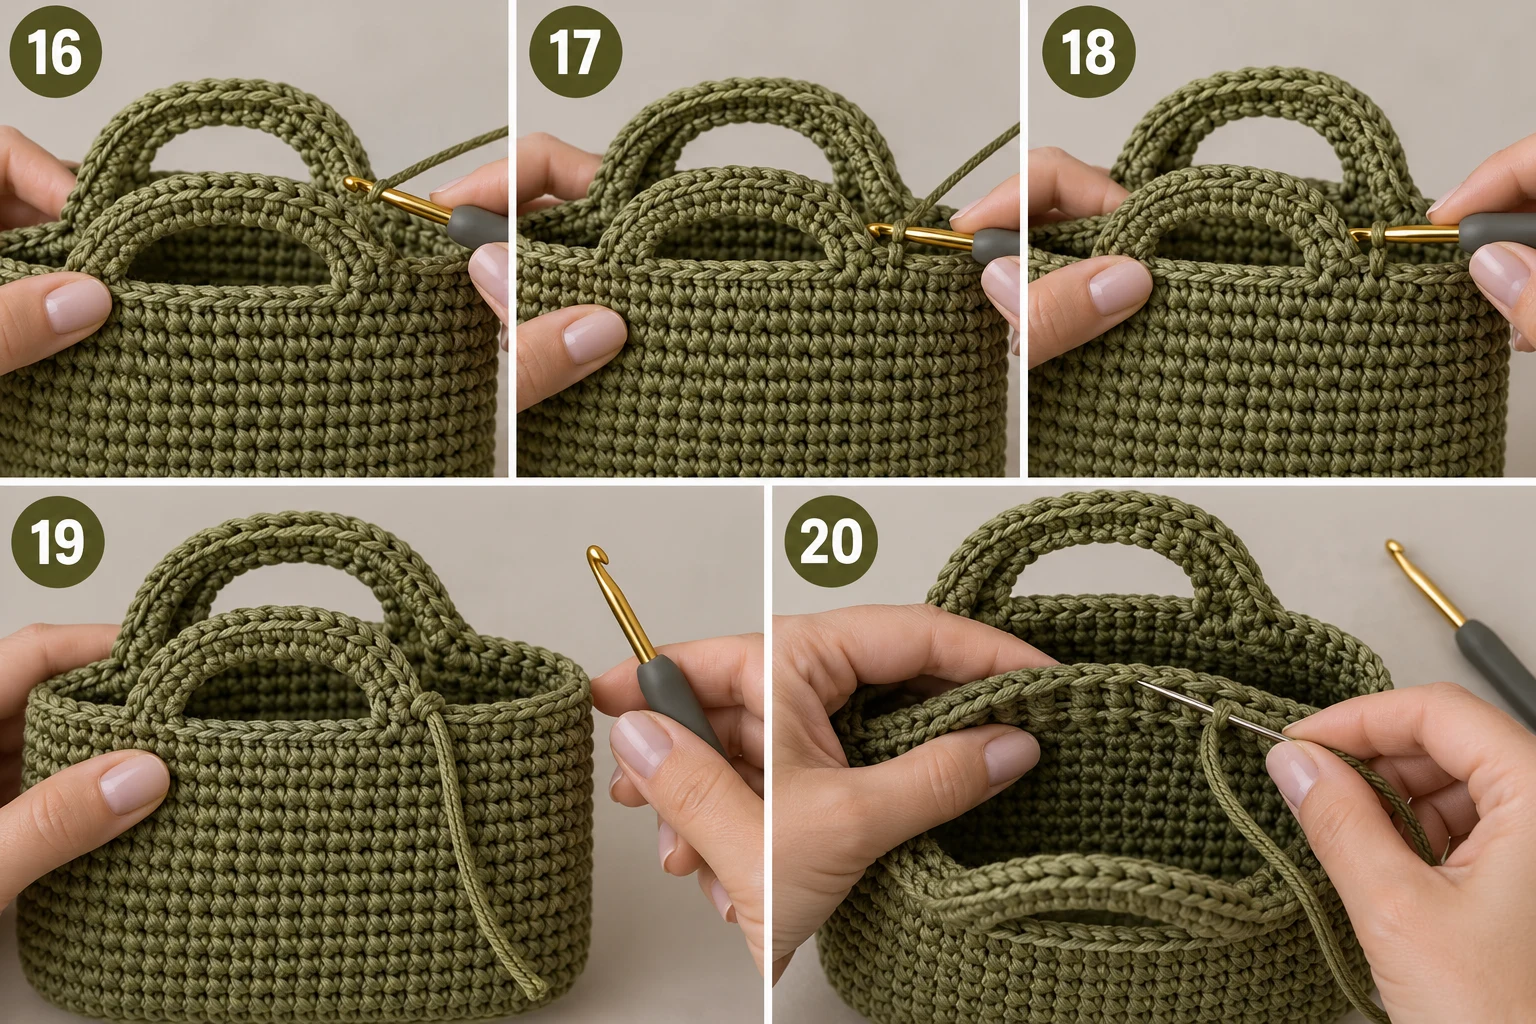
16. Reinforce the Second Handle
Action: Work 12 sc across the second 12-chain handle.
Detailed instructions: Continue in pattern across the intervening solid rim stitches until you reach the second handle. Insert beneath both loops of each chain and complete 1 sc per chain for 12 sc total, matching the tension used on the first handle.
Expected result: Both olive green handles are now equally thick and firm.
Check yourself: Each handle should contain 12 reinforcing sc, with neither arch twisted.
17. Complete the Reinforcement Round
Action: Finish Round 16 by working sc across every remaining solid rim stitch.
Detailed instructions: After the second reinforced handle, work 1 sc into each remaining sc from Round 15 until you return to the stitch marker. Because the 20 solid stitches and 24 handle-chain stitches are all worked once, Round 16 contains 44 sc total.
Expected result: The entire top edge and both handles form one continuous, sturdy 44-stitch round.
Check yourself: Count 44 sc total around Round 16: 20 over the solid rim sections plus 24 over the two handles.
18. Finish the Top Edge
Action: Slip stitch into the next stitch to create a clean ending.
Detailed instructions: Insert the hook beneath both top loops of the next sc, YO once, and pull the olive green cord directly through the stitch and the active loop on the hook in one motion. Keep this slip stitch relaxed so the rim does not pucker.
Expected result: The final round ends with a low, tidy transition instead of an abrupt raised step.
Check yourself: The last sc should flow smoothly into the next stitch without creating a tight dent in the top edge.
19. Fasten Off the Cord
Action: Cut and secure the working cord.
Detailed instructions: Cut the olive green macrame cord approximately 6 inches / 15 cm from the hook. YO with the cut end and pull the entire tail through the active loop. Remove the hook and pull the tail firmly enough to close the loop without distorting the neighboring stitch.
Expected result: The crochet is securely fastened with one 6-inch tail extending from the top edge.
Check yourself: Gently tug the tail; the final loop should tighten rather than unravel.
20. Weave In the Final Tail
Action: Weave the 6-inch tail securely into the inside stitches.
Detailed instructions: Thread the olive green tail through the tapestry needle. On the inside of the bag, pass the needle beneath 4 adjacent stitch backs, reverse direction beneath 3 neighboring stitch backs, then change direction once more beneath 3 stitches. Pull gently after each pass so the cord disappears without bunching the fabric, then trim the remaining end close to the crochet.
Expected result: Your small olive green macrame-cord handbag is completely finished, with no loose tails visible and two firm integrated handles.
Check yourself: Run your fingers around the inside top edge; the tail should stay hidden and secure when gently tugged.
Quick Reference
I always appreciate a quick reference when following crochet bags free patterns, so here are the important numbers for this exact small macrame bag in one place.
Section Round / Step Stitch Count Key Detail
Foundation Chain 17 ch Creates center of oval
Base side 1 Round 1 16 sc Work across back bumps
First curve Round 1 3 sc Same end chain
Base side 2 Round 1 15 sc Work opposite side
Second curve Round 1 2 additional sc 36 sts total
Base edge Round 2 36 sc BLO throughout
Body Rounds 3–14 36 sc each Continuous rounds
Handle setup Round 15 20 sc + 24 ch Two 12-ch handles
Each opening Round 15 8 skipped sts 8 beneath each handle
Reinforcement Round 16 44 sc 12 sc across each handle
Finish After Round 16 1 sl st Fasten off and weave tail
At the recommended gauge, expect a finished bag approximately 8.5 inches / 22 cm wide, 6.5–7 inches / 17–18 cm tall to the base of the handles, and approximately 9 inches / 23 cm tall including the handles. Small differences are completely normal with macrame cord.
📺 Watch the Video Tutorial
Final Thoughts
I hope this becomes one of those crochet bags free patterns you actually make more than once! I love how the olive green macrame cord turns simple single crochet into a bag that feels sturdy, modern, and much more elaborate than it really is. If you’re exploring small crochet bags free patterns or looking for a crochet bag free pattern easy enough for a first accessory, this is such a satisfying place to start. To finish it beautifully, lightly steam-block the bag from several inches away without pressing the cord directly, then shape it by hand. I’d love to see yours—share your finished bag and tag the blog!
Tips for a Better Experience
Keep the oval flat at the beginning. If the base curls dramatically before Round 2, your macrame-cord tension is probably too tight. Moving up to a 6.5 mm hook is better than fighting every stitch.
Mark the eight skipped stitches before chaining the handles. This is my favorite trick when making crochet bags free patterns for beginners because two extra markers let you confirm the handle placement before committing to it.
Don’t tighten the handle chains excessively. The 12 chains need enough flexibility to curve naturally. Tight chains create handles noticeably shorter than the reinforced rim surrounding them.
Adjust size through the body rounds, not randomly through the stitch count. For a slightly shorter olive green bag, stop the straight body at Round 12; for a taller one, add two or three additional 36-sc rounds before beginning the handles. This keeps the handle math unchanged.
FAQ
What makes crochet bags free patterns suitable for beginners?
The best crochet bags free patterns use repeatable stitches and uncomplicated construction. This project relies primarily on single crochet, continuous rounds, and simple chain handles, making it approachable while still teaching useful bag-making techniques.
How much cord do I need for crochet bags free patterns like this one?
For this specific pattern, allow approximately 180–200 meters of 3 mm olive green macrame cord. I recommend starting with a full 200-meter spool so small differences in tension don’t leave you short near the handles.
Why use macrame cord for crochet bags free patterns?
Macrame cord creates much firmer fabric than many ordinary yarns, so crochet bags free patterns with chunky yarn or cord can hold their shape with minimal finishing. Here, 3 mm braided macrame cord gives the small bag its crisp oval base, structured sides, and durable integrated handles.
Correct the stitch-count inconsistencies
📚 You Might Also Like
- Crochet bag charm free pattern: 7 Ultimate DIY Ideas
Crochet bag charms are small handmade accessories that attach to a handbag, tote, backpack, or purse…
- 15 Crochet Cosmetic Bag Ideas for a Handmade Beauty
Crochet cosmetic bags are handmade fabric pouches designed to organize makeup, skincare, toiletries,…
- Bubble bag crochet: 15 Perfect DIY Ideas for 2026
15 Bubble Bag Crochet Ideas That Turn Simple Stitches Into Statement Bags Bubble bag crochet is a cr…
- 15 Crochet Hand Bag Ideas to Make This Season
Crochet hand bags are handmade bags created by stitching yarn into a structured or flexible design t…
- Crochet bag design: 11 Easy DIY Ideas for 2026
14 Crochet Bag Design Ideas That Are Actually Fun to Make Crochet bag design ideas are all about tur…
🛍️ Shop the Look — crochet bags free patterns
Our handpicked Amazon picks curated specifically for crochet bags free patterns:
As an Amazon Associate I earn from qualifying purchases.