
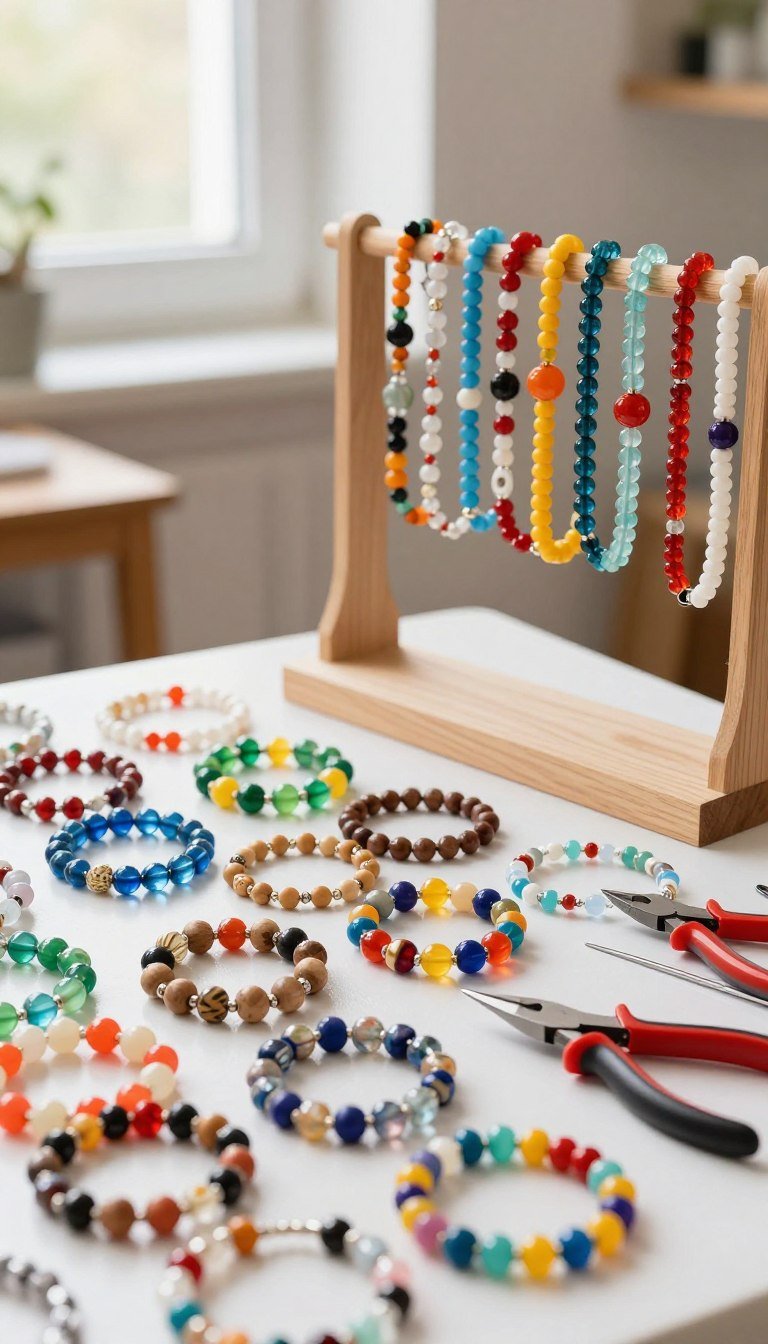
Starting your journey in making handcrafted accessories is a rewarding journey for anyone. You don’t need fancy tools or years of experience to create something beautiful. Simple projects help you build confidence and show off your unique style.
Learning basic techniques is key to mastering design. These affordable DIY methods transform simple materials into stunning pieces that show off your personality. Whether it’s for a gift or to update your collection, this guide is here to help.
Exploring your creativity should be fun and stress-free. We encourage you to start these projects and feel the joy of wearing something you made. Let’s start your journey to becoming a skilled artisan.
Key Takeaways
- Crafting your own accessories is an accessible and affordable hobby.
- Mastering basic techniques helps build essential skills and confidence.
- Simple projects allow for endless personalization and creative expression.
- You do not need specialized equipment to produce high-quality results.
- Starting small ensures a positive and rewarding learning experience.
Essential Tools and Materials for Your Beading Kit
Starting with a good workspace is key to making beaded jewelry ideas for beginners. The right tools help avoid frustration. With everything ready, you can focus on your creativity. Organizing your kit now saves you time later.

Must-Have Pliers for Jewelry Making
Pliers are essential for jewelry making. You don’t need many to start. Here are three must-haves:
- Chain-nose pliers: Great for gripping wire and opening jump rings.
- Round-nose pliers: Perfect for making loops and curves in wire.
- Wire cutters: Needed for clean, precise cuts in metal.
Selecting the Right Beading Wire and Cord
The strength of your stringing material is key. For beaded jewelry ideas for beginners, use a flexible, nylon-coated wire. It’s strong and looks professional.
For a softer look, try silk or nylon cord. Make sure the cord can handle your beads’ weight. Choosing the right material makes your work last.
Organizing Your Bead Collection
A messy workspace can mess with your mind. Sort your beads by color, size, or material. This makes it easy to see new ideas.
Use clear containers with dividers to keep things tidy. Label your bins for easy tracking. Being organized makes crafting stress-free.
Simple Beaded Jewelry Ideas for Beginners to Master
If you’re new to beaded jewelry ideas, start with the right materials. Knowing how different parts affect your design is key. The right supplies make your jewelry both stunning and long-lasting.

Understanding Bead Shapes and Materials
Beads come in many shapes, each with its own role. Round beads are versatile, bicones sparkle, and seed beads add texture. Try these shapes to see how they fit on a wire.
The bead’s material affects its durability. Glass and crystal beads shine, while wood beads have a natural look. Here’s a table to help pick the best materials for your next project:
| Material | Durability | Best Use |
|---|---|---|
| Glass | High | Everyday wear |
| Crystal | Medium | Special occasions |
| Wood | High | Casual, boho styles |
| Plastic | Low | Practice pieces |
Basic Color Theory for Jewelry Design
Color theory helps create harmonious jewelry. Use a color wheel to find matching shades. High-contrast combinations make bold, modern pieces.
Or, go for a monochromatic look for elegance. Mixing textures in one color adds depth. Learning these basics will make your beginner projects look professional.
Creating Classic Single-Strand Beaded Bracelets
The single-strand bracelet is a great start for beginners in beaded jewelry ideas. It teaches you the basics of stringing without the complexity of multi-strand designs. It is truly a rewarding experience to see your vision come to life with just a few simple materials.

Measuring Your Wrist for the Perfect Fit
Before you start stringing, you need to find the right length for your bracelet. Wrap a flexible measuring tape around your wrist bone. Make sure it’s comfortable without being too tight. Adding an extra half-inch ensures the bracelet moves naturally.
If you don’t have a measuring tape, use a piece of string. Then, measure it against a standard ruler. Keep your wrist size in a notebook for future projects. Precision at this stage makes your bracelet feel custom-made and professional.
Securing Your Bracelet with Crimp Beads
After stringing your beads, you need a way to close the loop. Crimp beads are small, soft metal tubes that you flatten over your beading wire. Using the right crimping pliers is key for a secure and clean finish.
To secure the design, slide a crimp bead onto the wire, followed by your clasp, and then loop the wire back through the crimp. Use the inner notch of your pliers to compress the bead firmly onto the wire. These beaded jewelry ideas for beginners help you build confidence as you master finishing your work.
Designing Minimalist Seed Bead Chokers
Seed bead chokers are a great choice for beginners. They are trendy and affordable. You can make them look fancy with just a few simple materials.

Choosing the Right Seed Bead Size
Seed beads come in different sizes, known as “aughts” or numbers with a slash and zero. A higher number means a smaller bead. Size 11/0 is popular for its delicate look.
For beginners, size 8/0 beads are easier to work with. They’re a bit bigger, making it easier to practice your skills. Remember, the beads’ weight affects how the choker feels on your neck.
| Bead Size | Diameter (Approx) | Best Use |
|---|---|---|
| 6/0 | 4.0 mm | Bold, chunky designs |
| 8/0 | 3.0 mm | Beginner-friendly projects |
| 11/0 | 2.2 mm | Delicate, minimalist chokers |
| 15/0 | 1.5 mm | Intricate bead weaving |
Attaching Clasps to Delicate Cord
It’s important to secure your choker well. Use high-quality crimp beads on thin cord. Place a crimp bead, loop through the clasp, and then flatten it with pliers.
For a neater look, use a knot cover. It hides your knots or crimps, giving your jewelry a professional finish. With these tips, you can make chokers that look like they’re from a store.
Crafting Elegant Drop Earrings with Headpins
Drop earrings are a great project for beginners. They help you learn wire-working skills and make something stunning to wear. With simple headpins, you can make professional-looking accessories quickly.

Mastering the Simple Loop Technique
The key to a polished look is a clean, consistent loop at the top of your headpin. First, put your chosen bead on the headpin. Then, use round-nose pliers to bend the wire at a ninety-degree angle just above the bead. Precision is key when you rotate your pliers to wrap the wire into a perfect circle.
After forming the loop, cut off any extra wire with your flush cutters. Make sure the loop is tight so your earring findings stay secure. Doing this often will help you get better at more complex designs.
Selecting Earring Hooks for Sensitive Ears
Comfort is as important as style when making jewelry. Many people get irritated from standard base metal findings. So, choosing the right materials is key. Always prioritize quality to make sure your creations are wearable for everyone.
Here are some hypoallergenic options for your next project:
- Sterling Silver: A classic choice that is durable and generally safe for most skin types.
- Niobium: An excellent, inert metal that is completely nickel-free and available in many vibrant colors.
- Gold-Filled: Offers the look of gold with a thick layer of real gold bonded to a base metal, providing great longevity.
By using these high-quality materials, your beaded jewelry ideas for beginners will be both beautiful and comfortable. Choosing the right hooks shows you care about the wearer’s experience.
Making Stretchy Memory Wire Rings
Working with tempered steel memory wire is a great start for beginners. It’s easy to work with because it keeps its shape. This lets you focus on your design without worrying about structure.

Benefits of Using Memory Wire
This wire has a permanent circular shape. It acts like a spring, so your rings will always return to their shape. This is great for making rings that stack well without needing clasps.
Without the need for fasteners, you can play with different bead patterns. It’s a fantastic way to improve your color skills and make unique accessories. These projects are quick, giving you fast results.
Finishing Ends for Comfort and Safety
It’s important to secure the wire ends for safety. Use round-nose pliers to make small, tight loops. This prevents the wire from scratching or snagging.
For extra safety, add rubber end caps or jewelry glue with a decorative bead. These steps keep your beaded jewelry ideas for beginners safe and stylish. Make sure your loops are closed for a smooth finish.
Assembling Multi-Strand Statement Necklaces
Making multi-strand necklaces is a great way to show off your creativity. They are perfect beaded jewelry ideas for beginners who want a bold, professional look. Layering strands adds depth and interest to your accessories.

Using Multi-Strand Spacers
Keeping strands organized is essential to avoid tangling. Multi-strand spacers hold each string in place, making the necklace look great. They have multiple holes for connecting several strands to one clasp.
These spacers keep your design tidy all day. Without them, strands can twist and hide your bead patterns. Choose a spacer that fits the number of strands you’re using.
Balancing Weight and Design
A comfortable fit is as important as the look of your necklace. Uneven weight can make the necklace pull or sit crooked. Spread out heavier beads evenly to keep the design balanced.
Here’s a table to help pick the right materials for your multi-strand projects:
| Spacer Type | Best For | Primary Benefit |
|---|---|---|
| Bar Spacers | Seed beads | Prevents tangling |
| Curved Spacers | Heavy gemstones | Follows neck curve |
| Decorative Spacers | Statement pieces | Adds visual flair |
Test the weight before finishing your crimps for a smooth fit. These simple techniques make multi-strand projects rewarding. With practice, you’ll create stunning, layered pieces that look like they’re from a boutique.
Working with Elastic Cord for Quick Projects
Stretch bracelets are a top pick for beaded jewelry ideas for beginners. They don’t need complicated clasps or metal parts. They slide on easily and stay comfortable all day. Using top-notch elastic makes your accessories look great and last long.

Choosing Durable Elastic Materials
Not all elastic cords are the same. Picking the right one is key for your designs to last. Look for high-performance elastic threads, like braided fibers or special silicone. These types don’t fray and stay stretchy longer than regular rubber bands.
Stay away from thin, clear plastic cords that feel weak. Go for durable, fabric-covered elastic instead. It’s softer on the skin and holds knots better. Quality cord means your designs won’t fall apart after a few wears.
Tying Secure Knots That Last
A strong knot is what keeps your stretch bracelet together. An overhand knot isn’t enough, so use a surgeon’s knot for better security. This involves looping the cord through the center twice before tightening it, making a stronger hold.
After tying your knot, add a small drop of clear jewelry glue or nail polish to it. This keeps it from slipping. Once dry, tuck the knot inside a bigger bead to keep your design neat. Learning these tricks makes working with elastic cord very rewarding for beaded jewelry ideas for beginners.
Incorporating Charms and Pendants into Your Designs
You can make your handmade accessories stand out by adding unique charms and pendants. These small touches let you show off your style and try out new beaded jewelry ideas for beginners. Whether you like vintage metal charms or bright enamel pendants, they bring a touch of class to any piece.

Using Jump Rings Effectively
Jump rings are key for connecting your charms to your design. To open them right, use two pairs of pliers to twist them open sideways. This crucial technique keeps the metal from bending and makes sure your jewelry stays put.
Make sure the jump ring ends meet perfectly when you close them. A small gap can cause your charm to catch on clothes or fall off. By getting this right, you also avoid wearing out your wire and cord.
Creating Focal Points in Your Jewelry
A focal point grabs your attention and gives your piece direction. Place a bigger, more detailed pendant in the middle of your necklace or bracelet. This turns simple bead strings into sophisticated custom jewelry.
Think about the weight of your pendant compared to your beads. A heavy pendant needs a stronger cord or wire to keep its shape. Getting this balance right is key for anyone wanting to grow their beaded jewelry collection.
| Jump Ring Size | Best Use Case | Wire Gauge |
|---|---|---|
| 4mm | Delicate charm bracelets | 20 Gauge |
| 6mm | Standard necklace pendants | 18 Gauge |
| 8mm | Heavy statement pieces | 16 Gauge |
Tips for Choosing the Right Bead Sizes and Colors
Starting with beaded jewelry ideas for beginners can be exciting but also overwhelming. The variety of colors and sizes is vast. Finding the right mix is an art that greatly affects your jewelry’s quality.
By aiming for balance and harmony, you can make pieces that look professional. This is key to creating stunning jewelry.
Mixing Textures for Visual Interest
Adding depth to your designs is easy with mixing different textures. Try pairing matte beads with metallic accents for a striking contrast. This combination catches the light beautifully.
Translucent beads add a lovely, airy feel. They work well with opaque stones, creating a beautiful contrast.
Experimenting with size variations is also important. Place a large, textured focal bead between smaller, smooth spacers. This creates a dynamic look. It makes your beaded jewelry ideas for beginners feel more sophisticated.
Creating Cohesive Color Palettes
Choosing a color scheme is the most exciting part of designing. Start with a dominant color and add two complementary shades for balance. A color wheel can help you find the best hues to pair.
Remember, consistency is key for high-end jewelry. Use a limited palette of three or four colors. This keeps your design cohesive and prevents it from looking cluttered.
Troubleshooting Common Beading Mistakes
Even the most skilled jewelry makers face occasional snags. When you’re trying out beaded jewelry ideas for beginners, you might hit a few bumps. Don’t get discouraged if your project isn’t perfect at first.
Fixing Tangled or Broken Wires
A tangled wire can be frustrating, but it’s usually easy to fix. Use fine-tip tweezers to gently untangle the knot. Avoid pulling hard, as it might kink the metal. If the wire breaks, you can hide the fix with a crimp bead inside a decorative one.
If the damage is too big, it’s better to start over. Re-stringing your beads is a great way to practice and ensure your piece is secure. Even pros often redo their work to get it just right.
Correcting Uneven Bead Patterns
Getting a balanced look is key for quality results. If your pattern looks uneven, check your bead count. Adding a small spacer bead can fix spacing issues without taking the whole piece apart.
If the pattern is off-center, lay it on a bead board to see the layout. This simple step helps catch mistakes early. Mastering these small adjustments will improve your beaded jewelry ideas for beginners and boost your confidence.
| Common Issue | Quick Fix | Prevention Tip |
|---|---|---|
| Tangled Wire | Use tweezers to loosen | Keep wire spools organized |
| Broken Strand | Use a crimp bead | Check wire for kinks |
| Uneven Spacing | Add spacer beads | Use a bead board |
| Loose Clasp | Tighten jump ring | Test closure before wearing |
Conclusion
Learning these basic techniques can open a world of creativity for your handmade items. You now know how to turn simple materials into beautiful accessories that show off your style.
Trying out different beaded jewelry ideas can boost your confidence with each new piece. You might get inspired by Miyuki seed beads’ bright colors or Swarovski crystals’ classic look. Each project helps you move towards more complex designs.
Don’t stop trying new textures and patterns to find your unique style. Your hard work will lead to amazing results that will wow your friends and family. Sharing your creations brings happiness to both you and the person wearing them.
We encourage you to start your next project with these beginner beaded jewelry ideas. Your creative journey is just starting, and the possibilities for your designs are endless. Pick up your pliers and begin crafting your next masterpiece today.
FAQ
What are the best beaded jewelry ideas for beginners to start with?
For beginners, start with single-strand bracelets and elastic cord projects. These ideas focus on color and basic stringing. As you get better, try minimalist seed bead chokers or memory wire rings.
Which specific tools should I invest in for my first beading kit?
Invest in quality tools from brands like Beadalon or Xuron. Your kit should have chain-nose pliers, round-nose pliers, and flush wire cutters. These tools will help with many projects, from earrings to necklaces.
How do I choose the right size for seed beads?
Seed beads are sized by “aught” numbers like 8/0, 10/0, or 11/0. The higher the number, the smaller the bead. For a delicate choker, 11/0 is good. Beginners might prefer larger 6/0 beads.
What is the secret to making a secure knot in elastic jewelry?
For elastic cord, use the Surgeon’s Knot. Then, add a drop of G-S Hypo Cement. This keeps the knot secure, even with wear and stretch.
How can I ensure my handmade earrings won’t irritate sensitive skin?
Use hypoallergenic earring hooks for drop earrings. Choose Niobium, Titanium, or Sterling Silver. Tierracast offers nickel-free options that are safe and comfy for all.
What is the benefit of using memory wire for jewelry?
Memory wire keeps its shape forever. It’s great for beginners because it’s easy to use. Just string beads and finish with a loop.
How do I prevent my multi-strand necklaces from tangling?
Use spacers or special clasps for multi-strand necklaces. These keep strands apart. Balance the weight for a neat look.
What should I do if I make a mistake in my bead pattern?
Don’t worry about mistakes! If your pattern is off, unstring and start again. Use a bead board to plan your design for a perfect look.